Required Tools
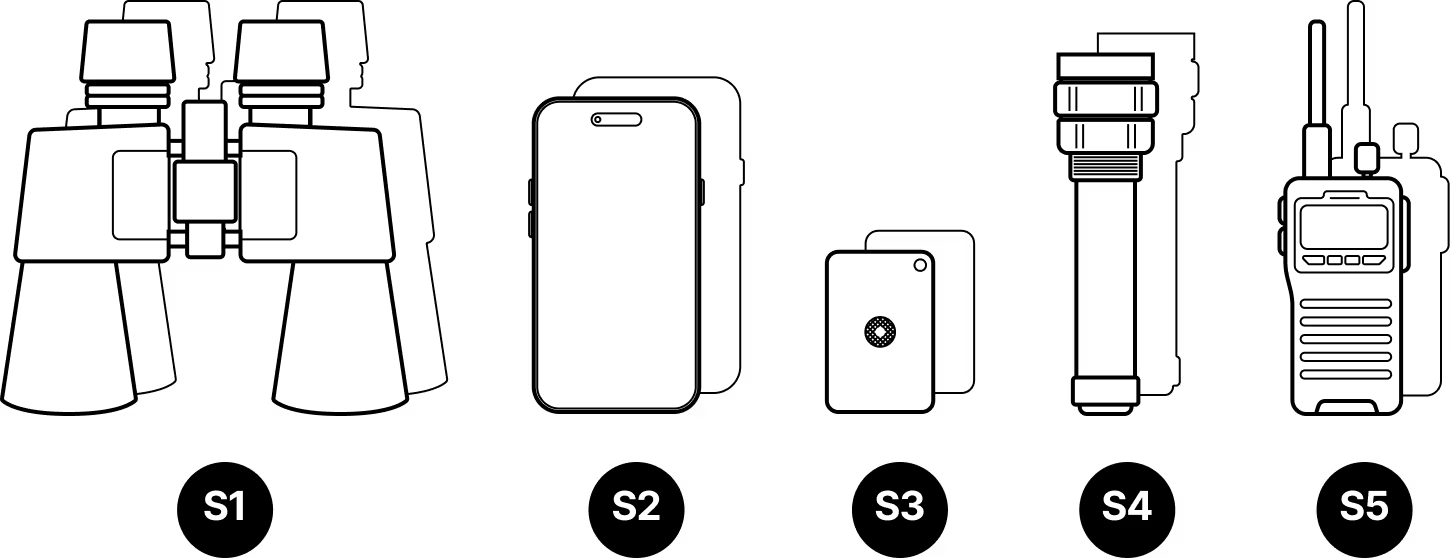
Site Survey
- S1
Binoculars (x2, one for each site)
- S2
Mobile phone with camera (x2)
- S3
Signaling mirror (x2)
- S4
High-powered flashlight (x2)
- S5
Walkie-talkie (if no cell coverage) (x2)
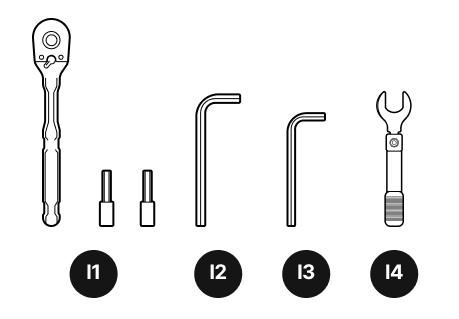
Installation tools
- I1
¼-inch ratchet and sockets
- I2
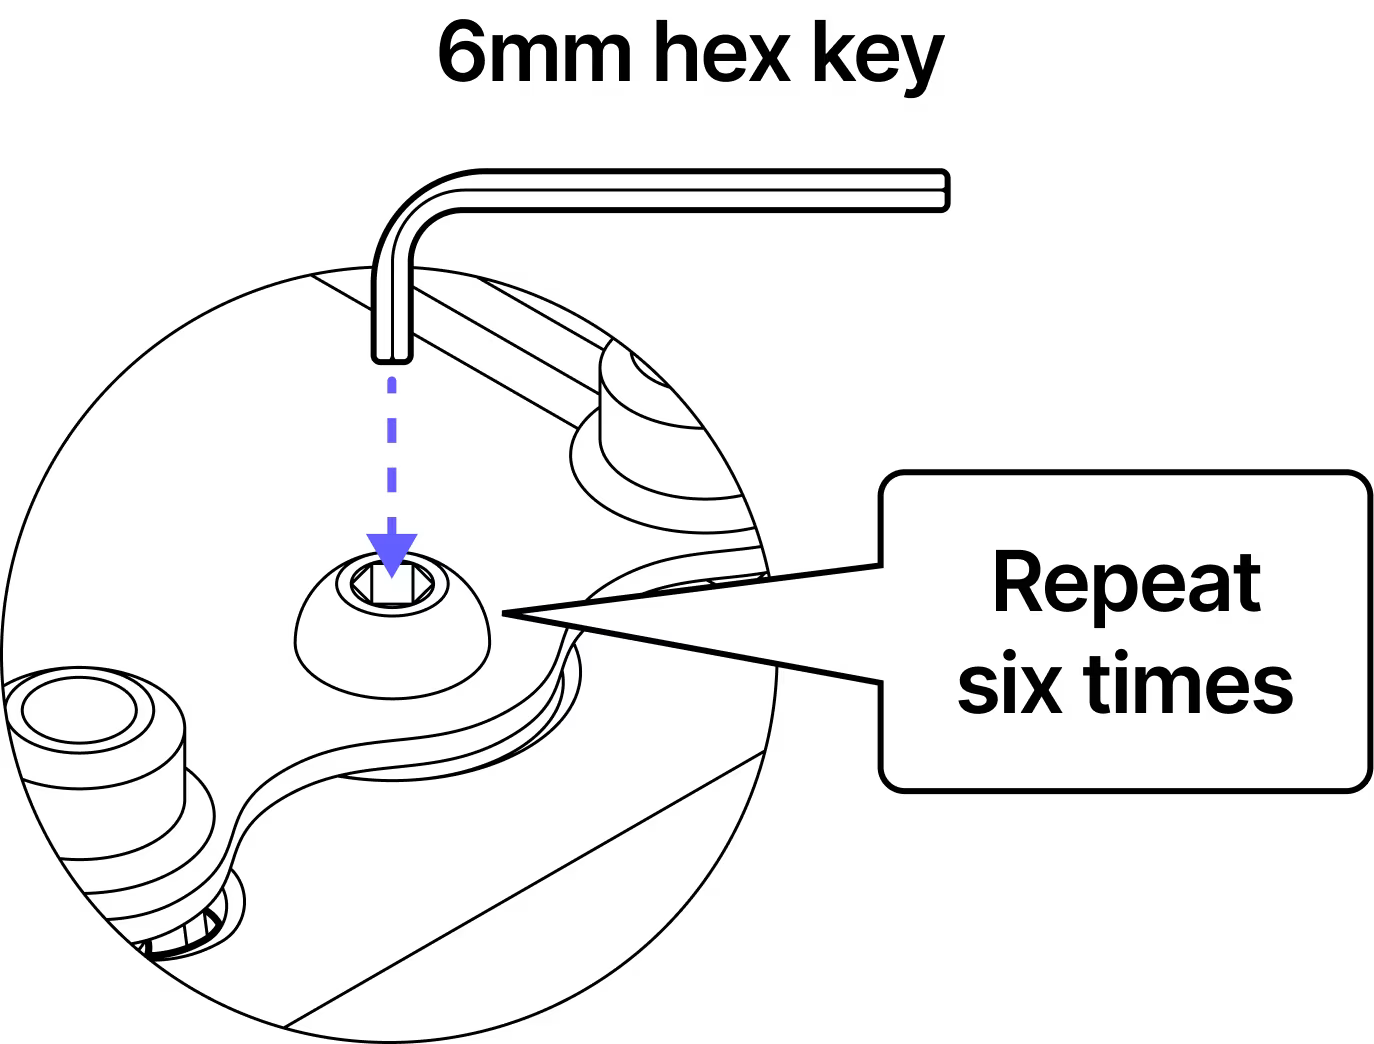
6 mm hex key
- I3
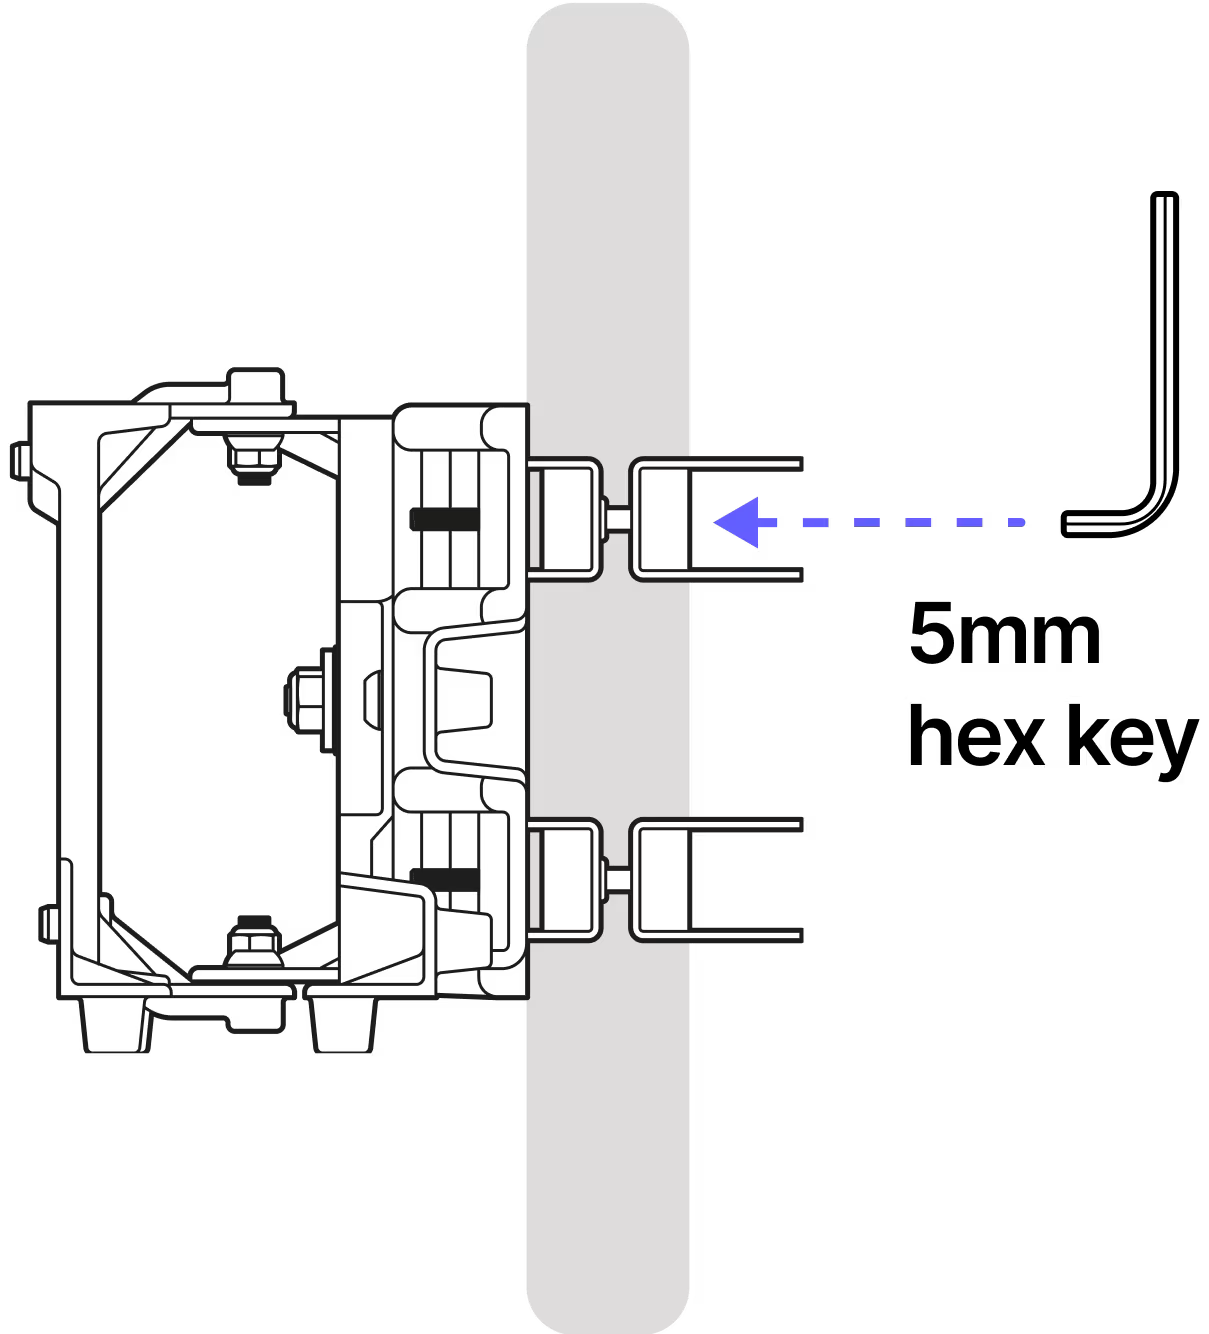
5 mm hex key
- l4
Torque wrench (not provided)
Safety
Do not power on the terminal until instructed.
Avoid working in strong winds or unfavorable weather conditions.
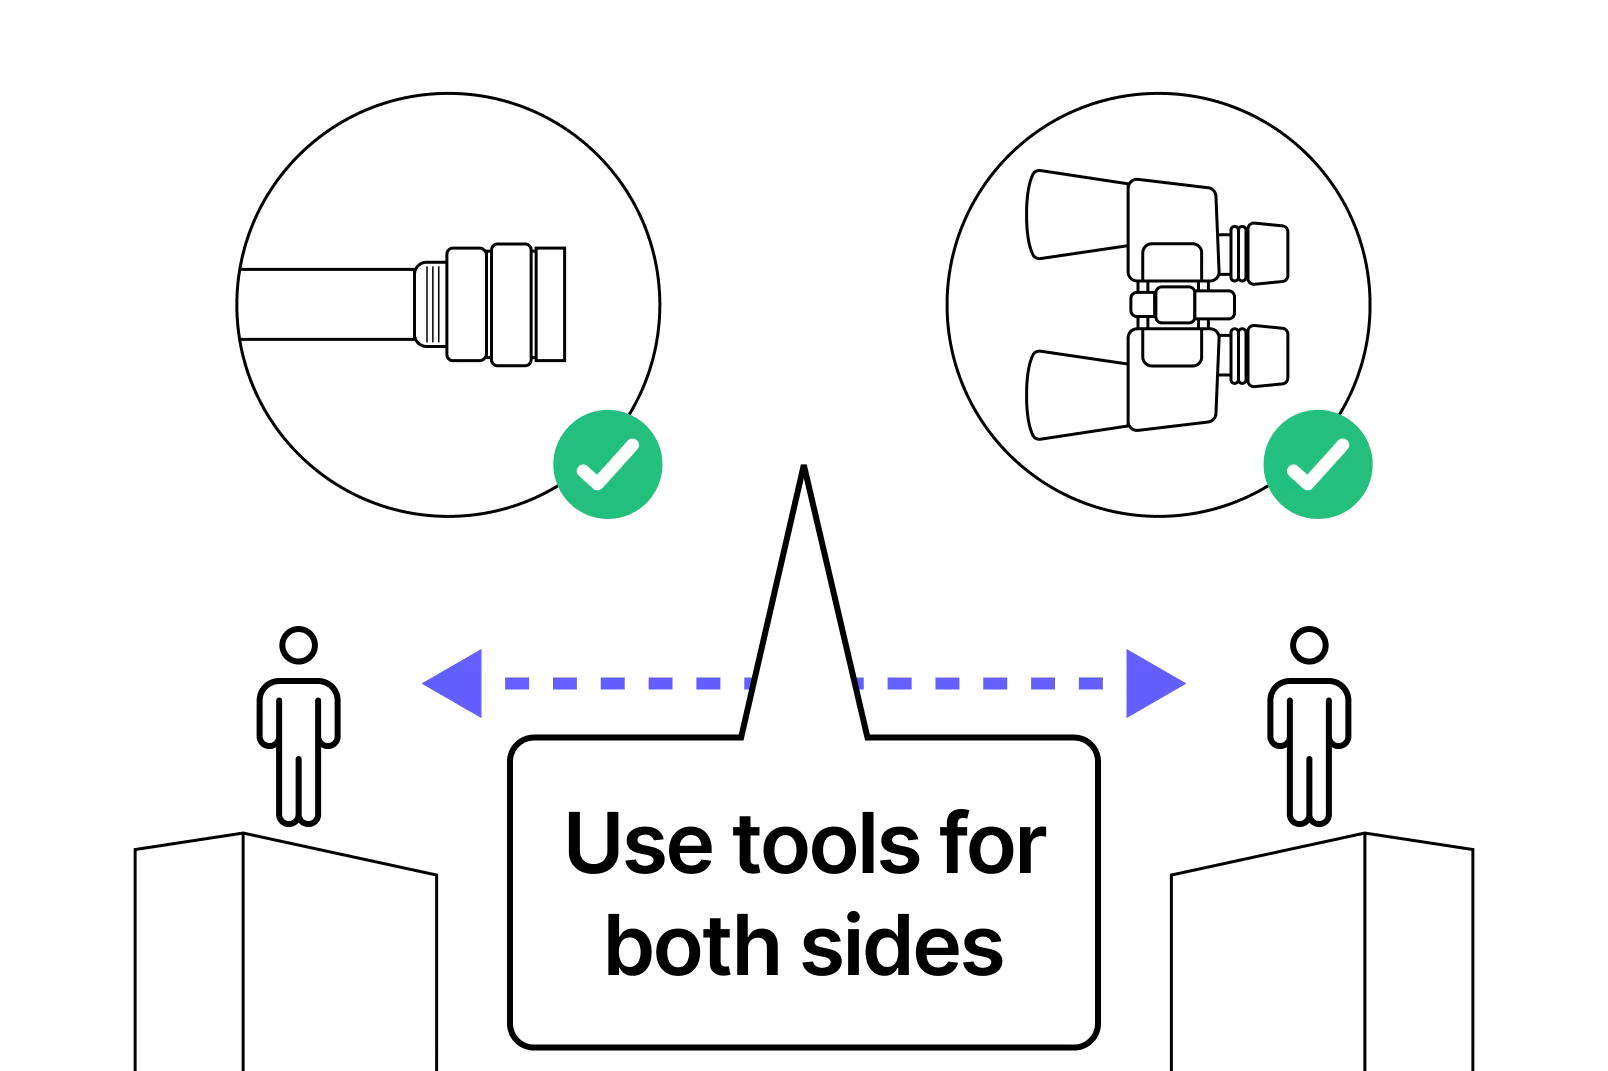
It is recommended to perform the installation with a partner.
Use safety harnesses when working on elevated areas.
An installer is required at each site to signal flash and align the terminal brackets.
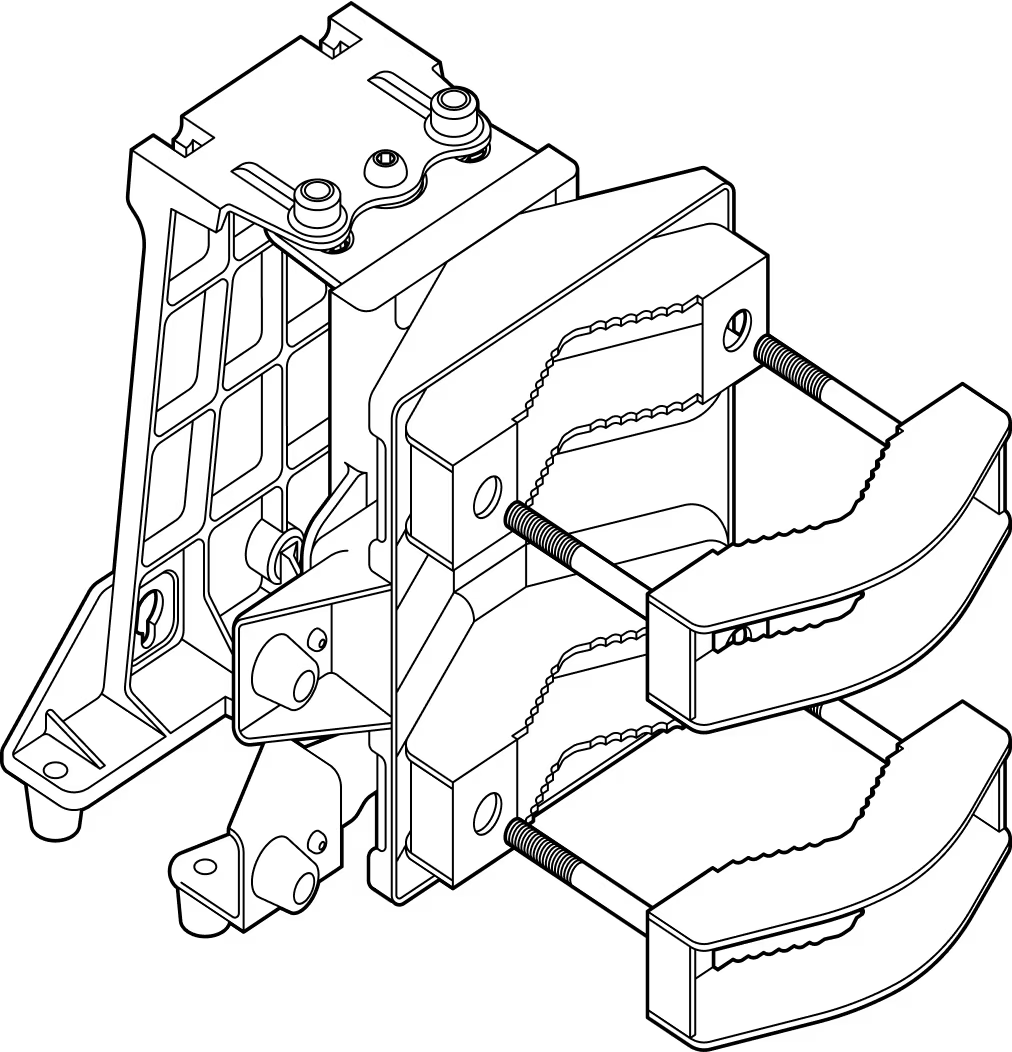
Assembly Diagram
Installation
Step 1
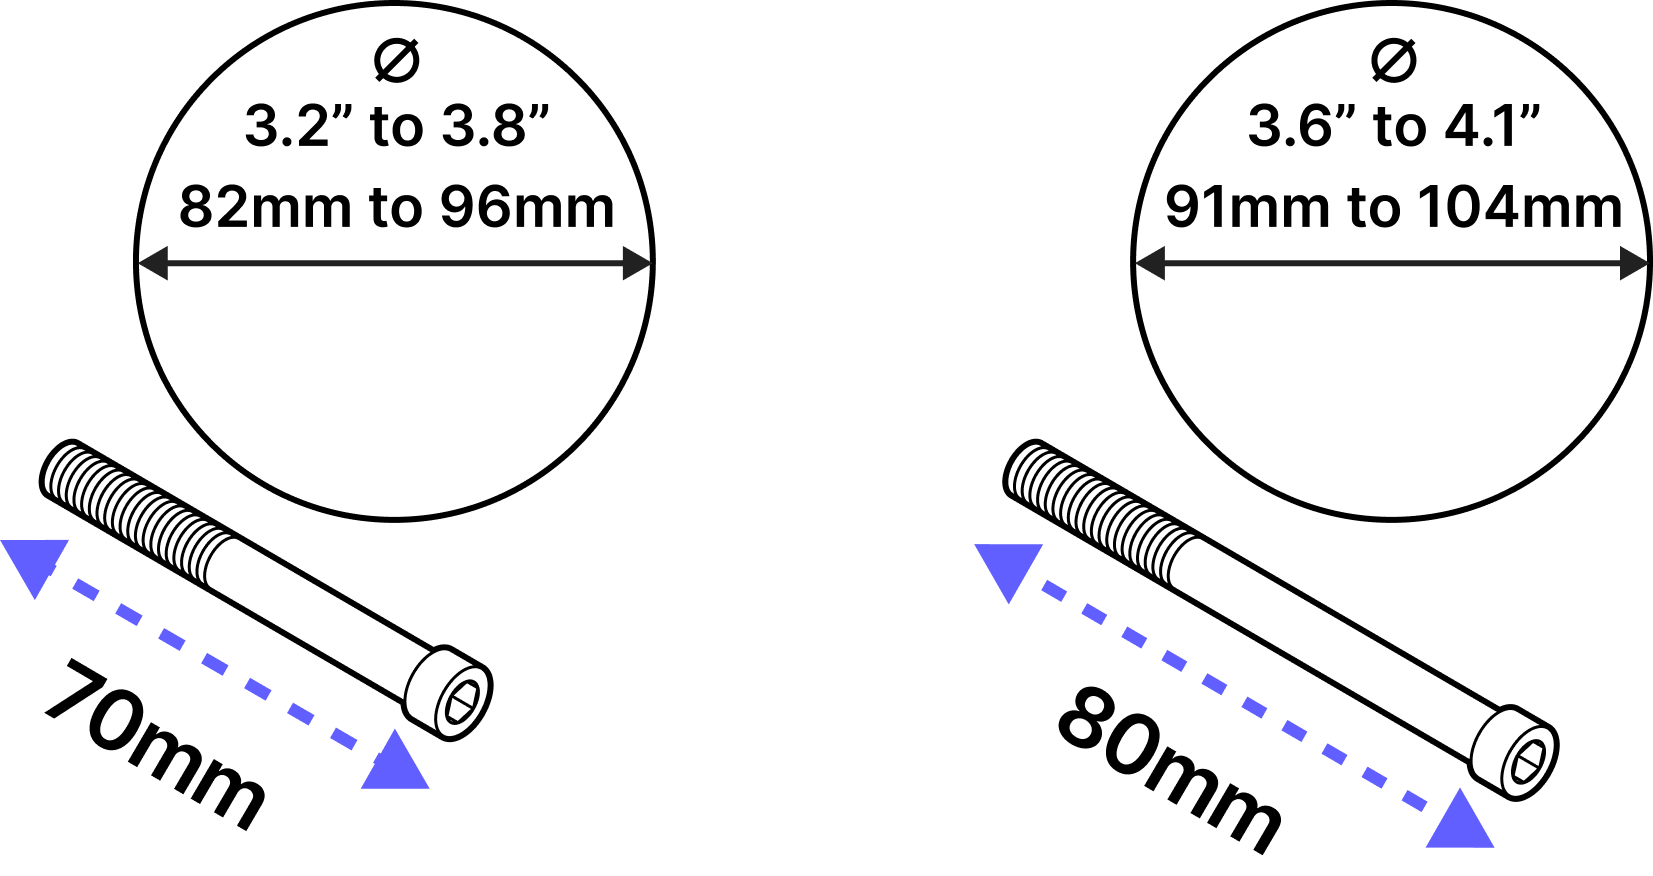
The bracket comes with two bolt sizes to fit different pole diameters. Select the appropriate bolt size for your installation.
Step 2
Pre-install the bolts on one of the bracket jaws.
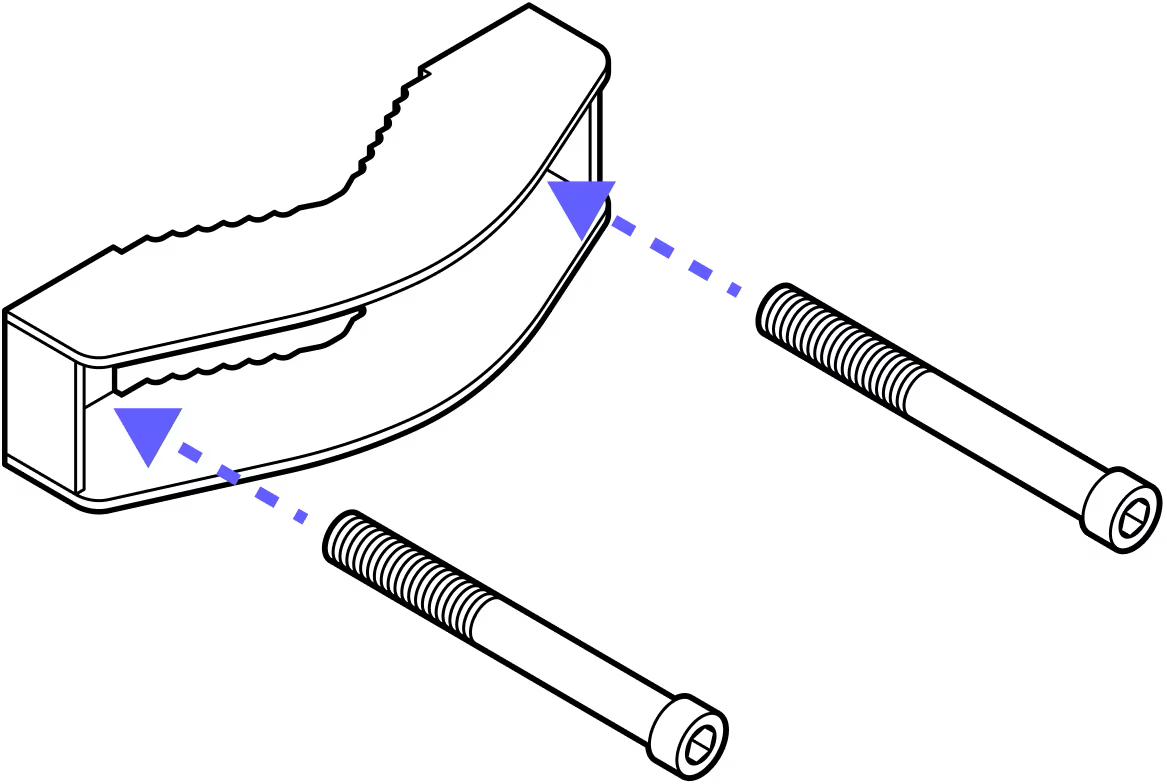
Step 3
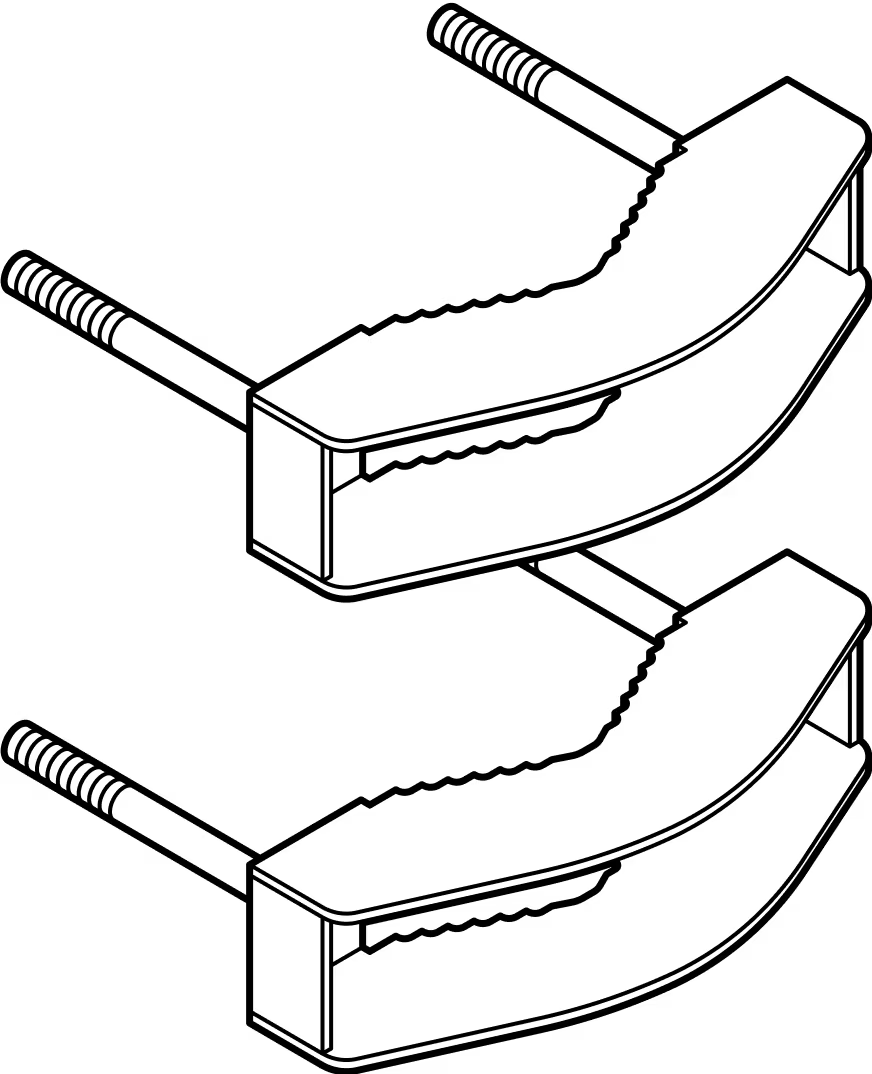
Repeat for the second jaw.
Step 4
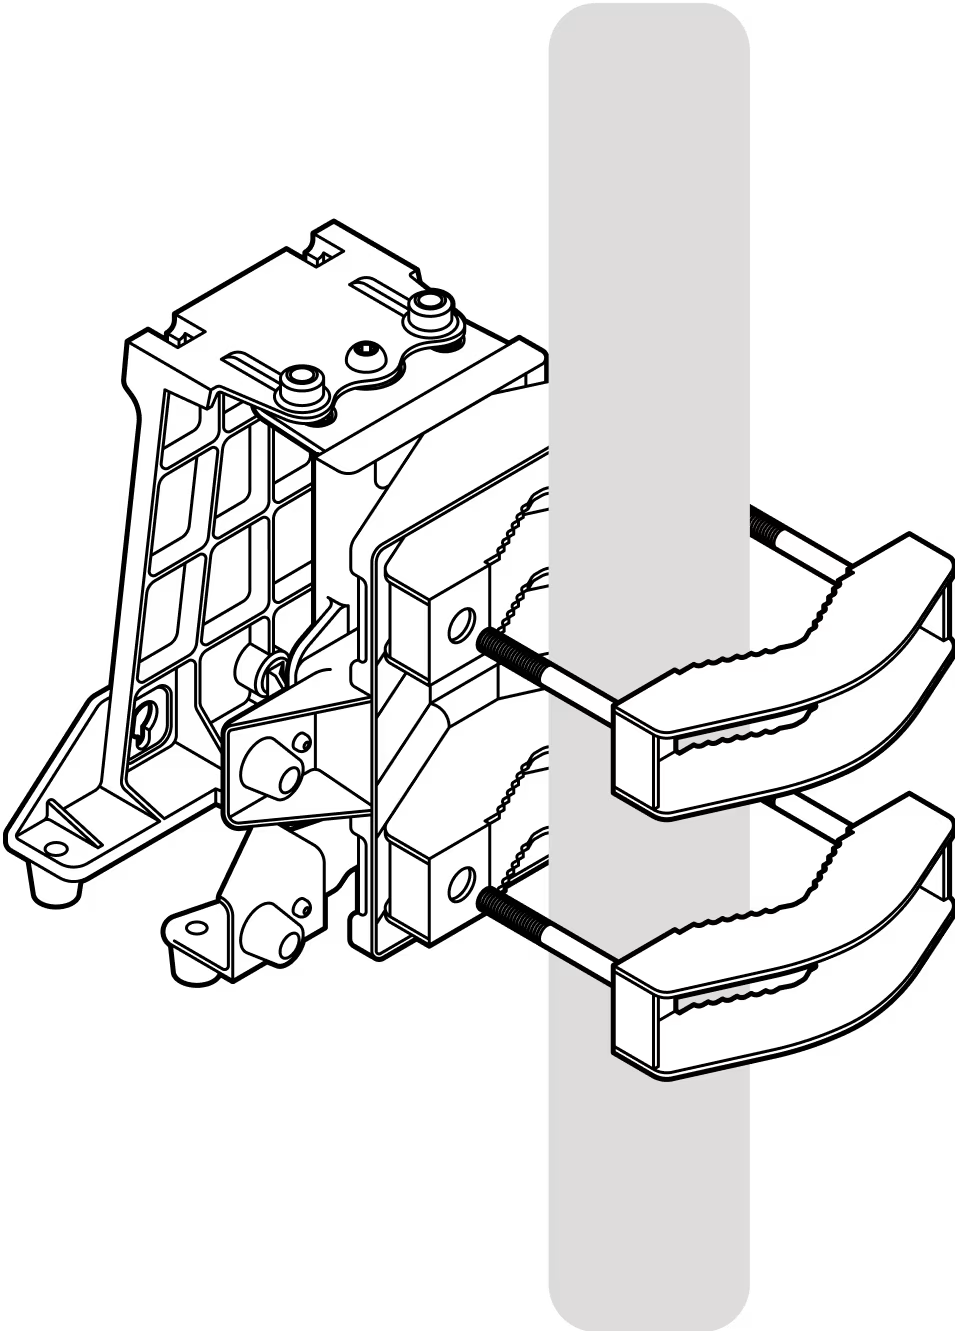
Fasten the jaws to the bracket around the pole. Note the orientation of the bracket - the wide end of the bracket should be on the bottom.
Step 5
Tighten the bolts enough to hold the bracket in place. DO NOT FULLY TIGHTEN as you may need to make adjustments to the bracket's alignment.
Step 6
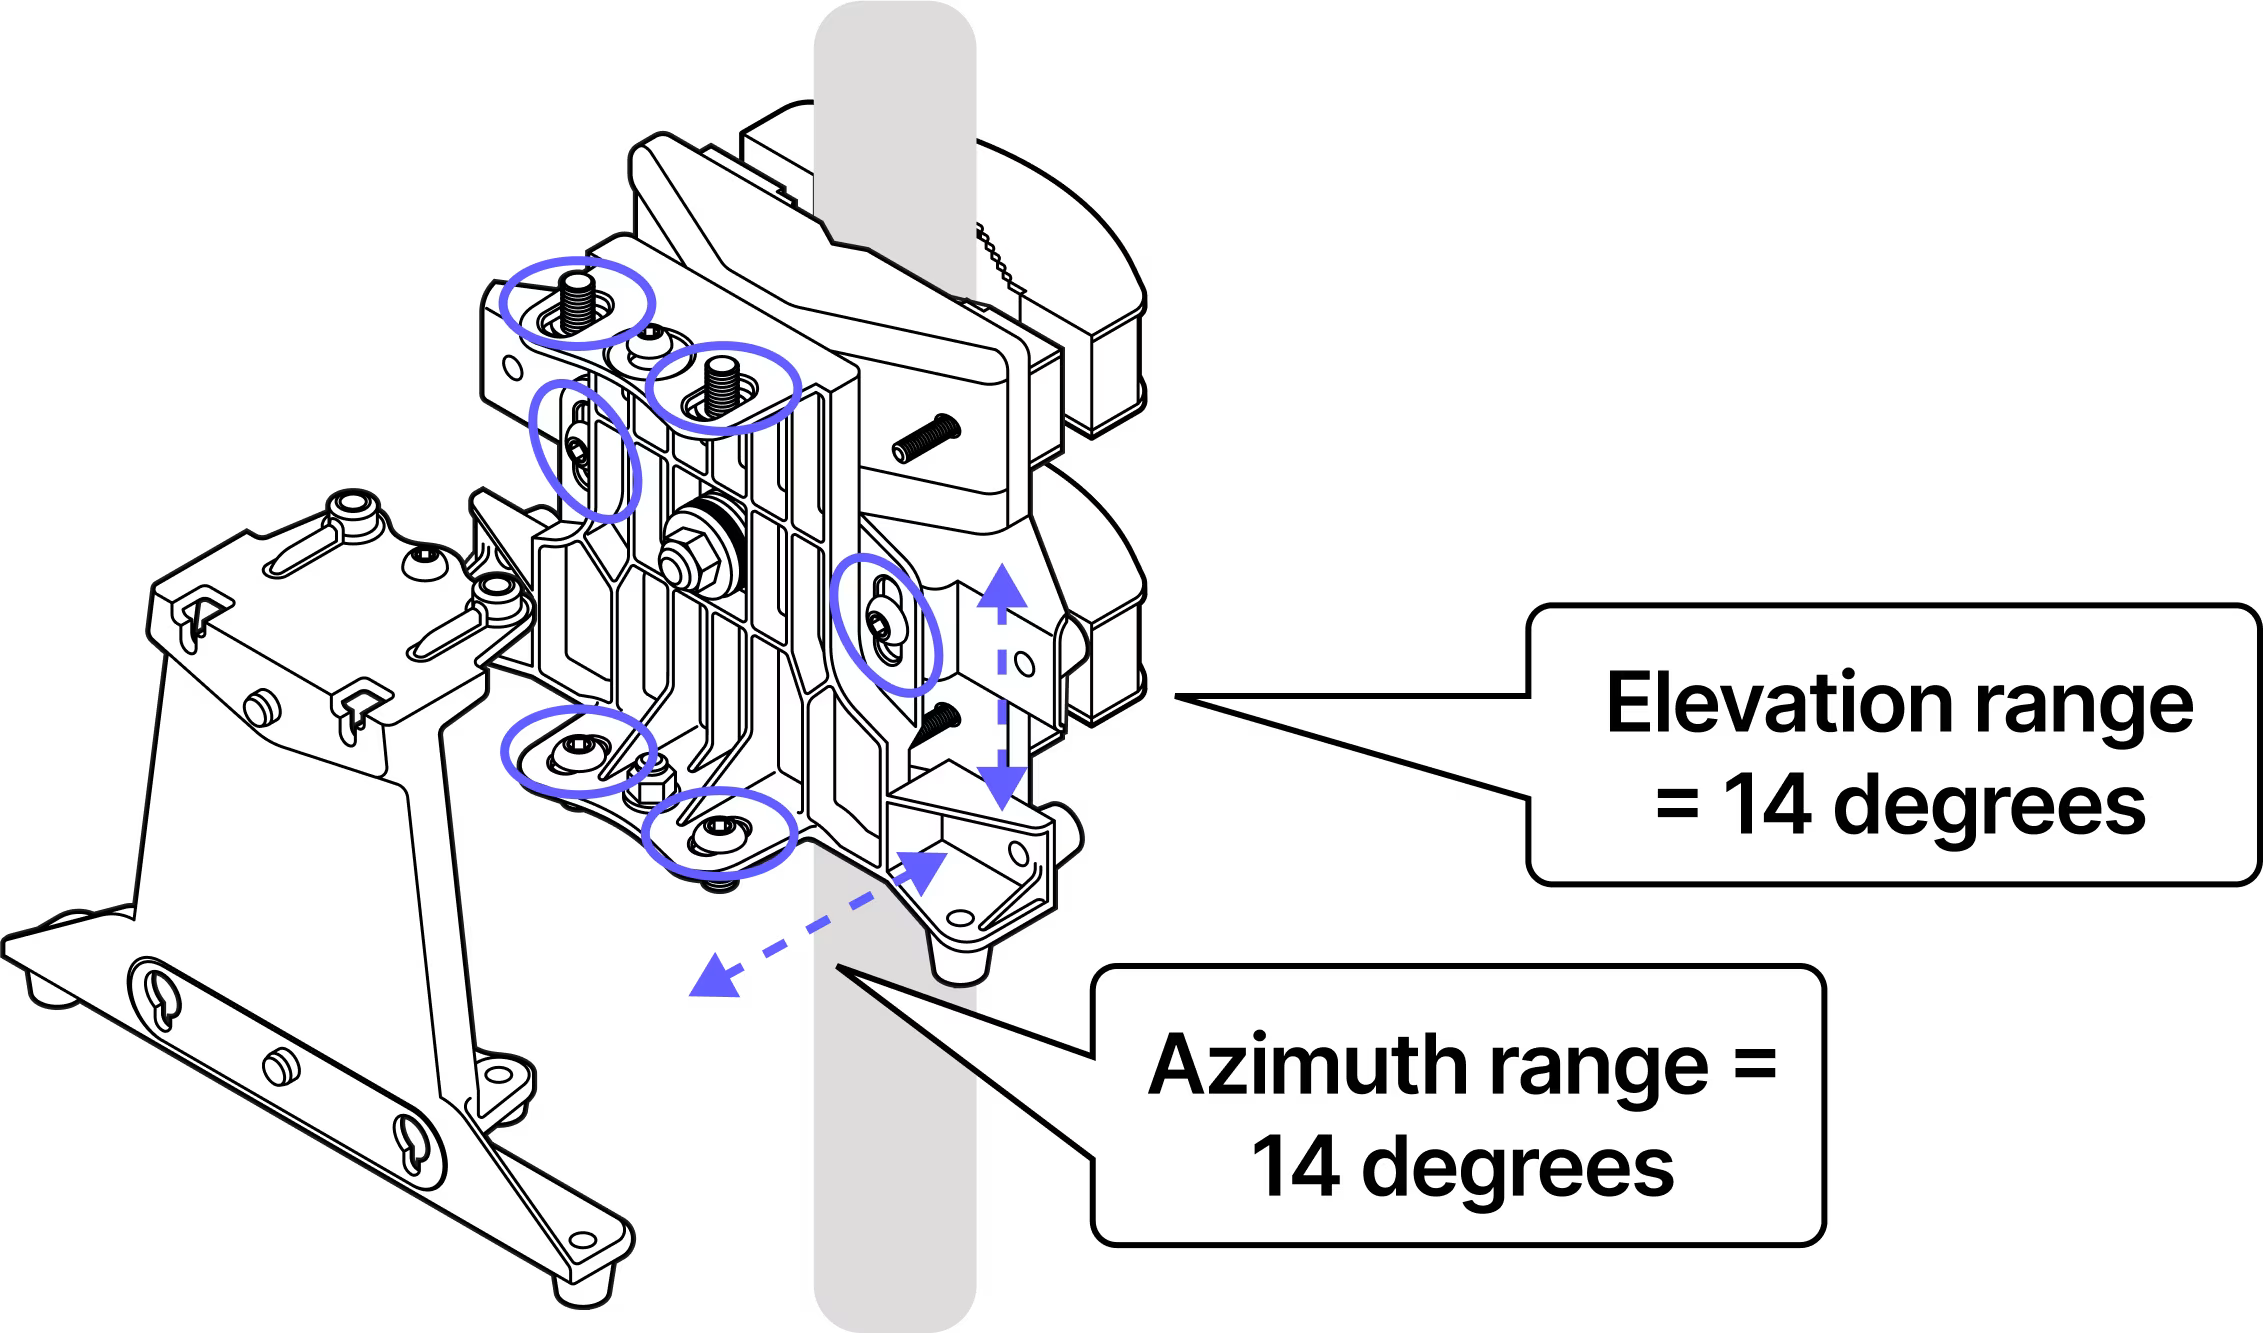
The azimuth and elevation adjustment fasteners are set to mid-travel.
Step 7
Tighten all six adjustment fasteners: 2 on the bottom and 2 on the top for azimuth and 1 each on the front and back for elevation.
Step 8
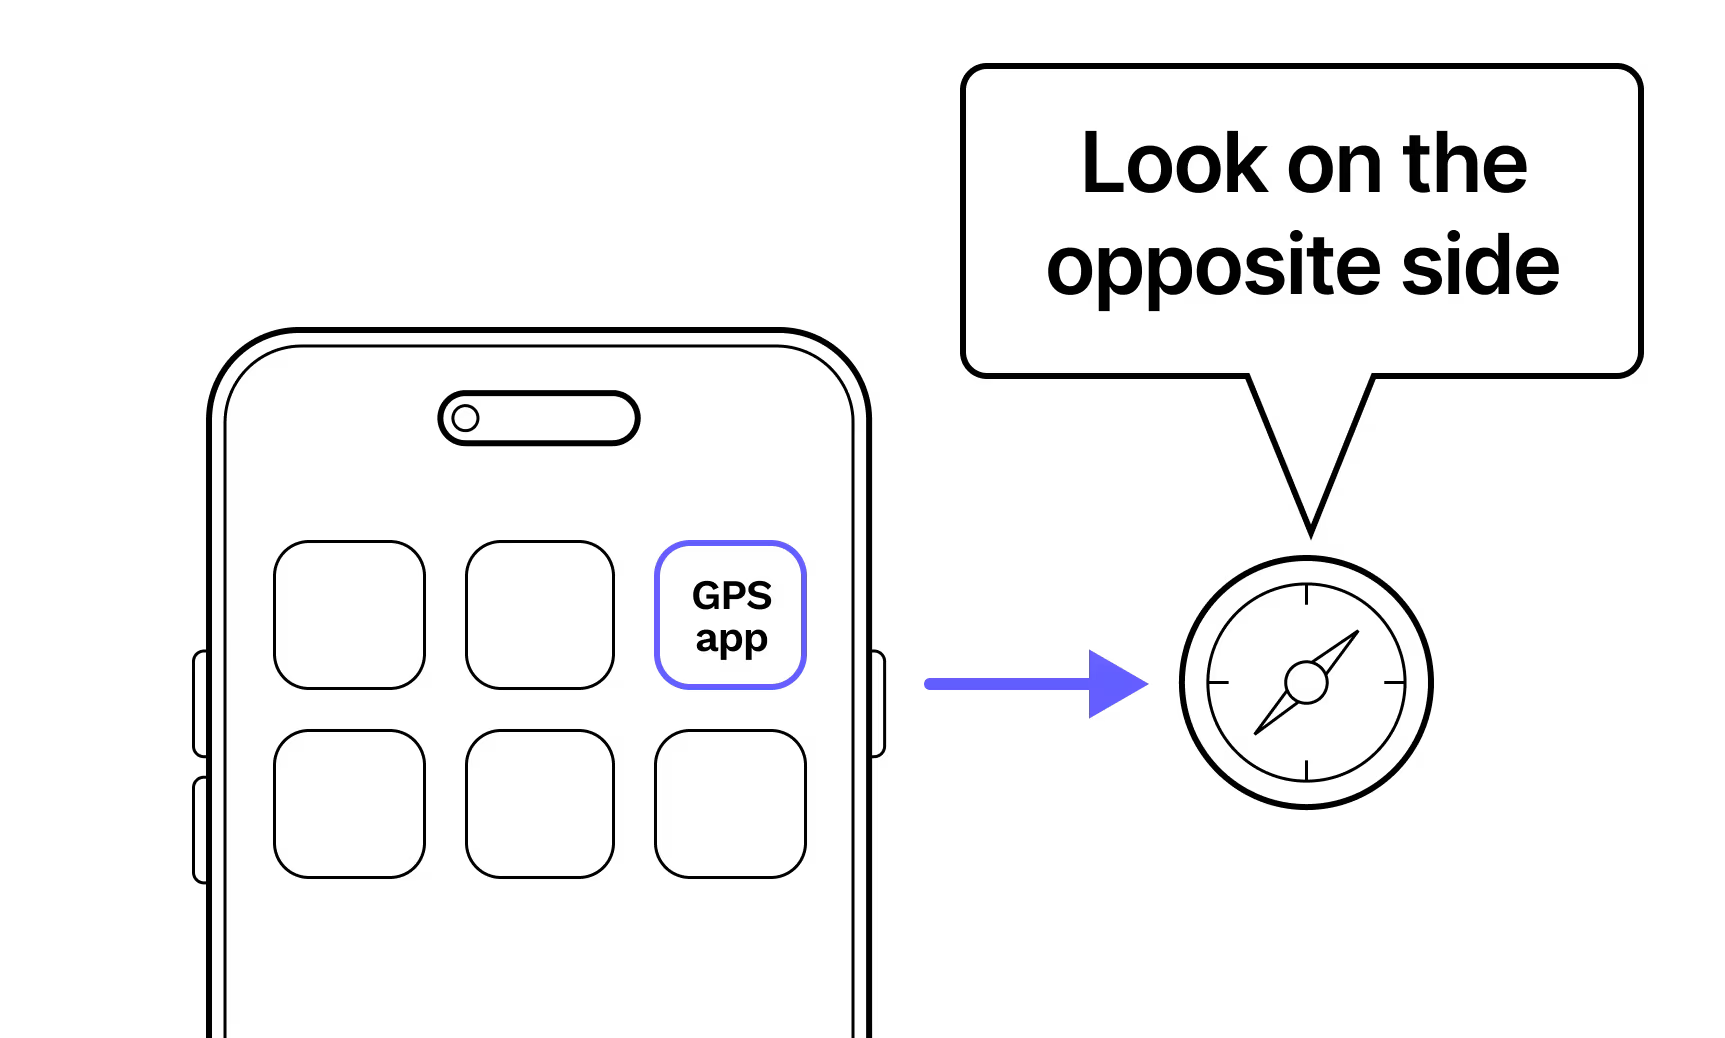
Using your GPS app and the coordinates for each site, point the bracket towards the other site.
Step 9
Use the video you took during the site survey and your signal mirrors to help align the two mounting brackets.
Step 10
Loosen the bracket jaws at each site so you can spin the brackets to align with each other.
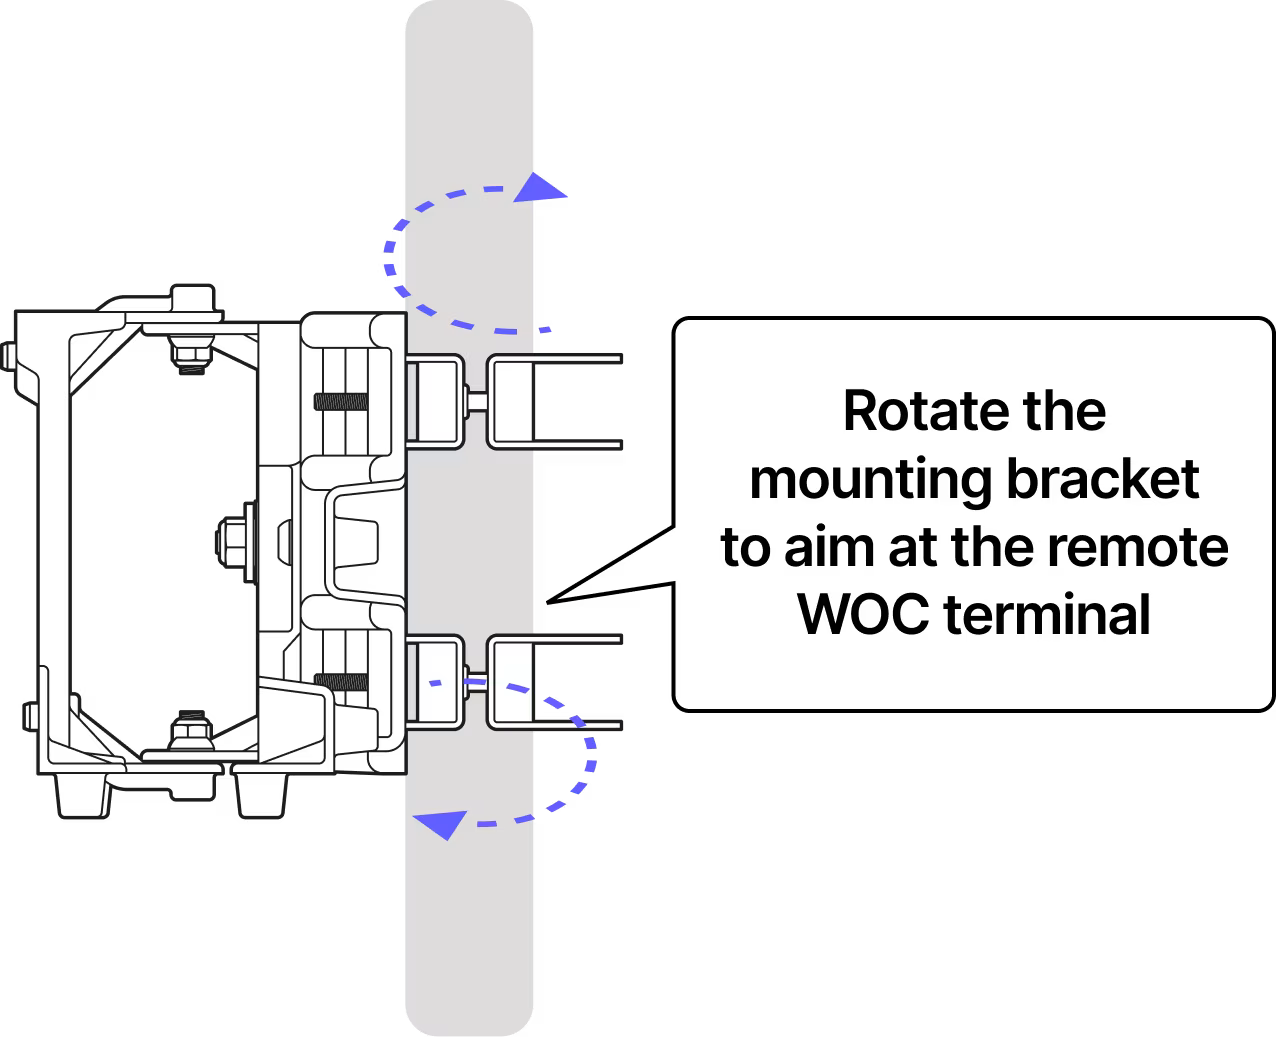
Step 11
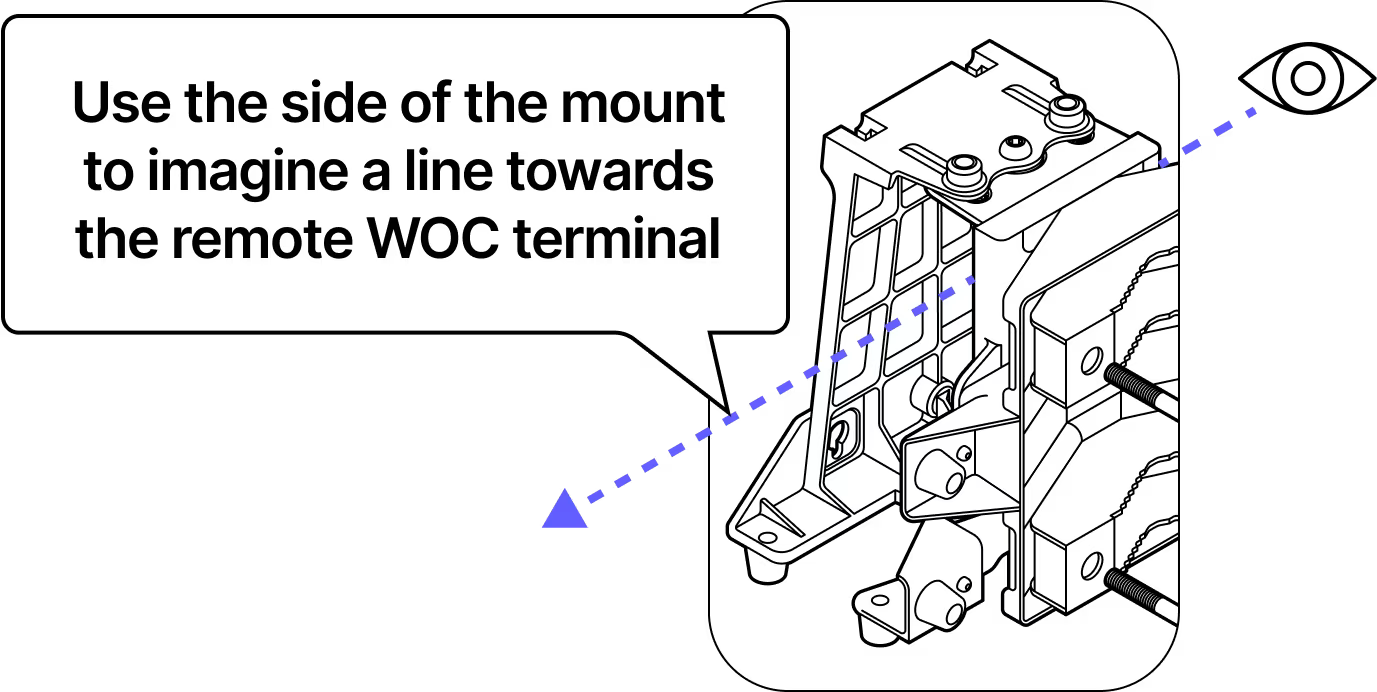
Use the face of the bracket as a pointer to align with the other site. It is helpful if the other site is actively flashing with the signalling mirror during this step.
Step 12
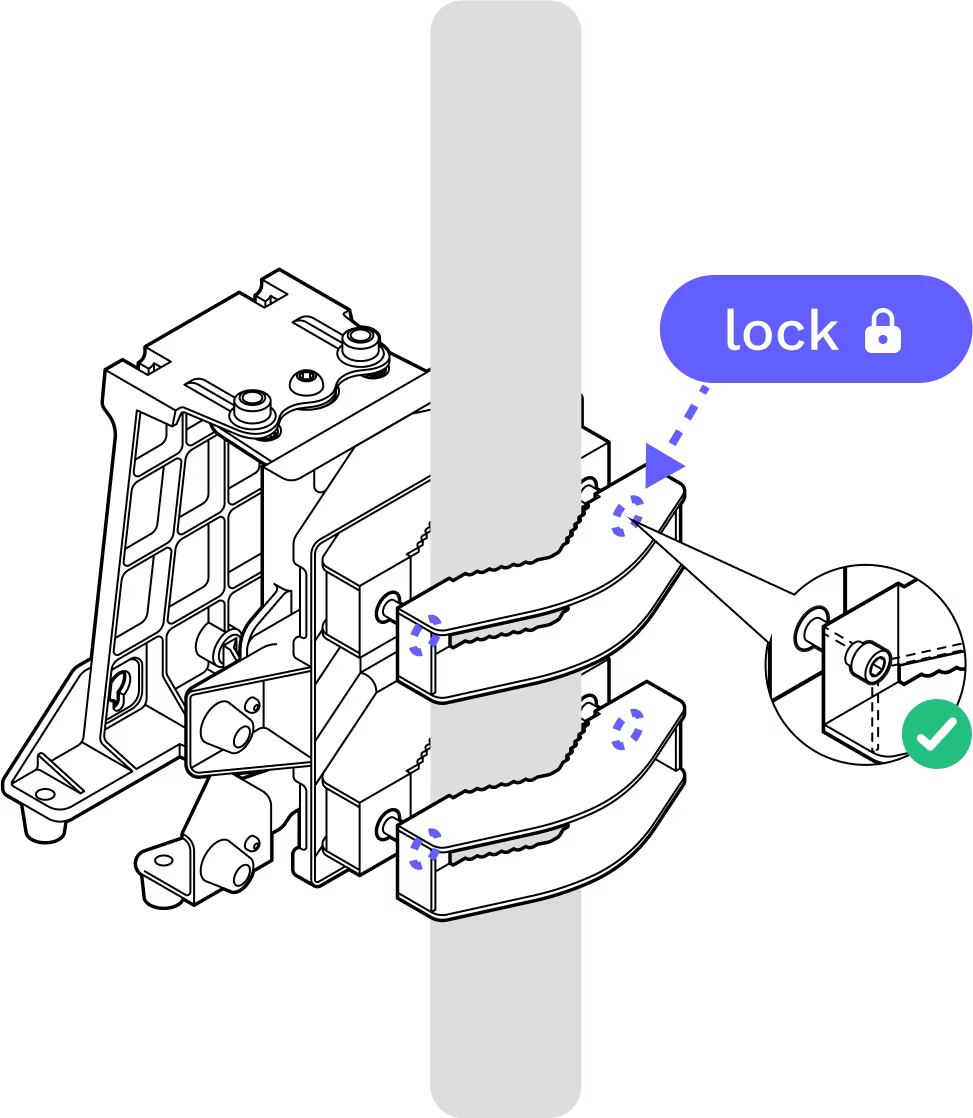
Once the bracket is aligned, re-tighten the bolts. Double check the alignment when tight and adjust if necessary.
Step 13
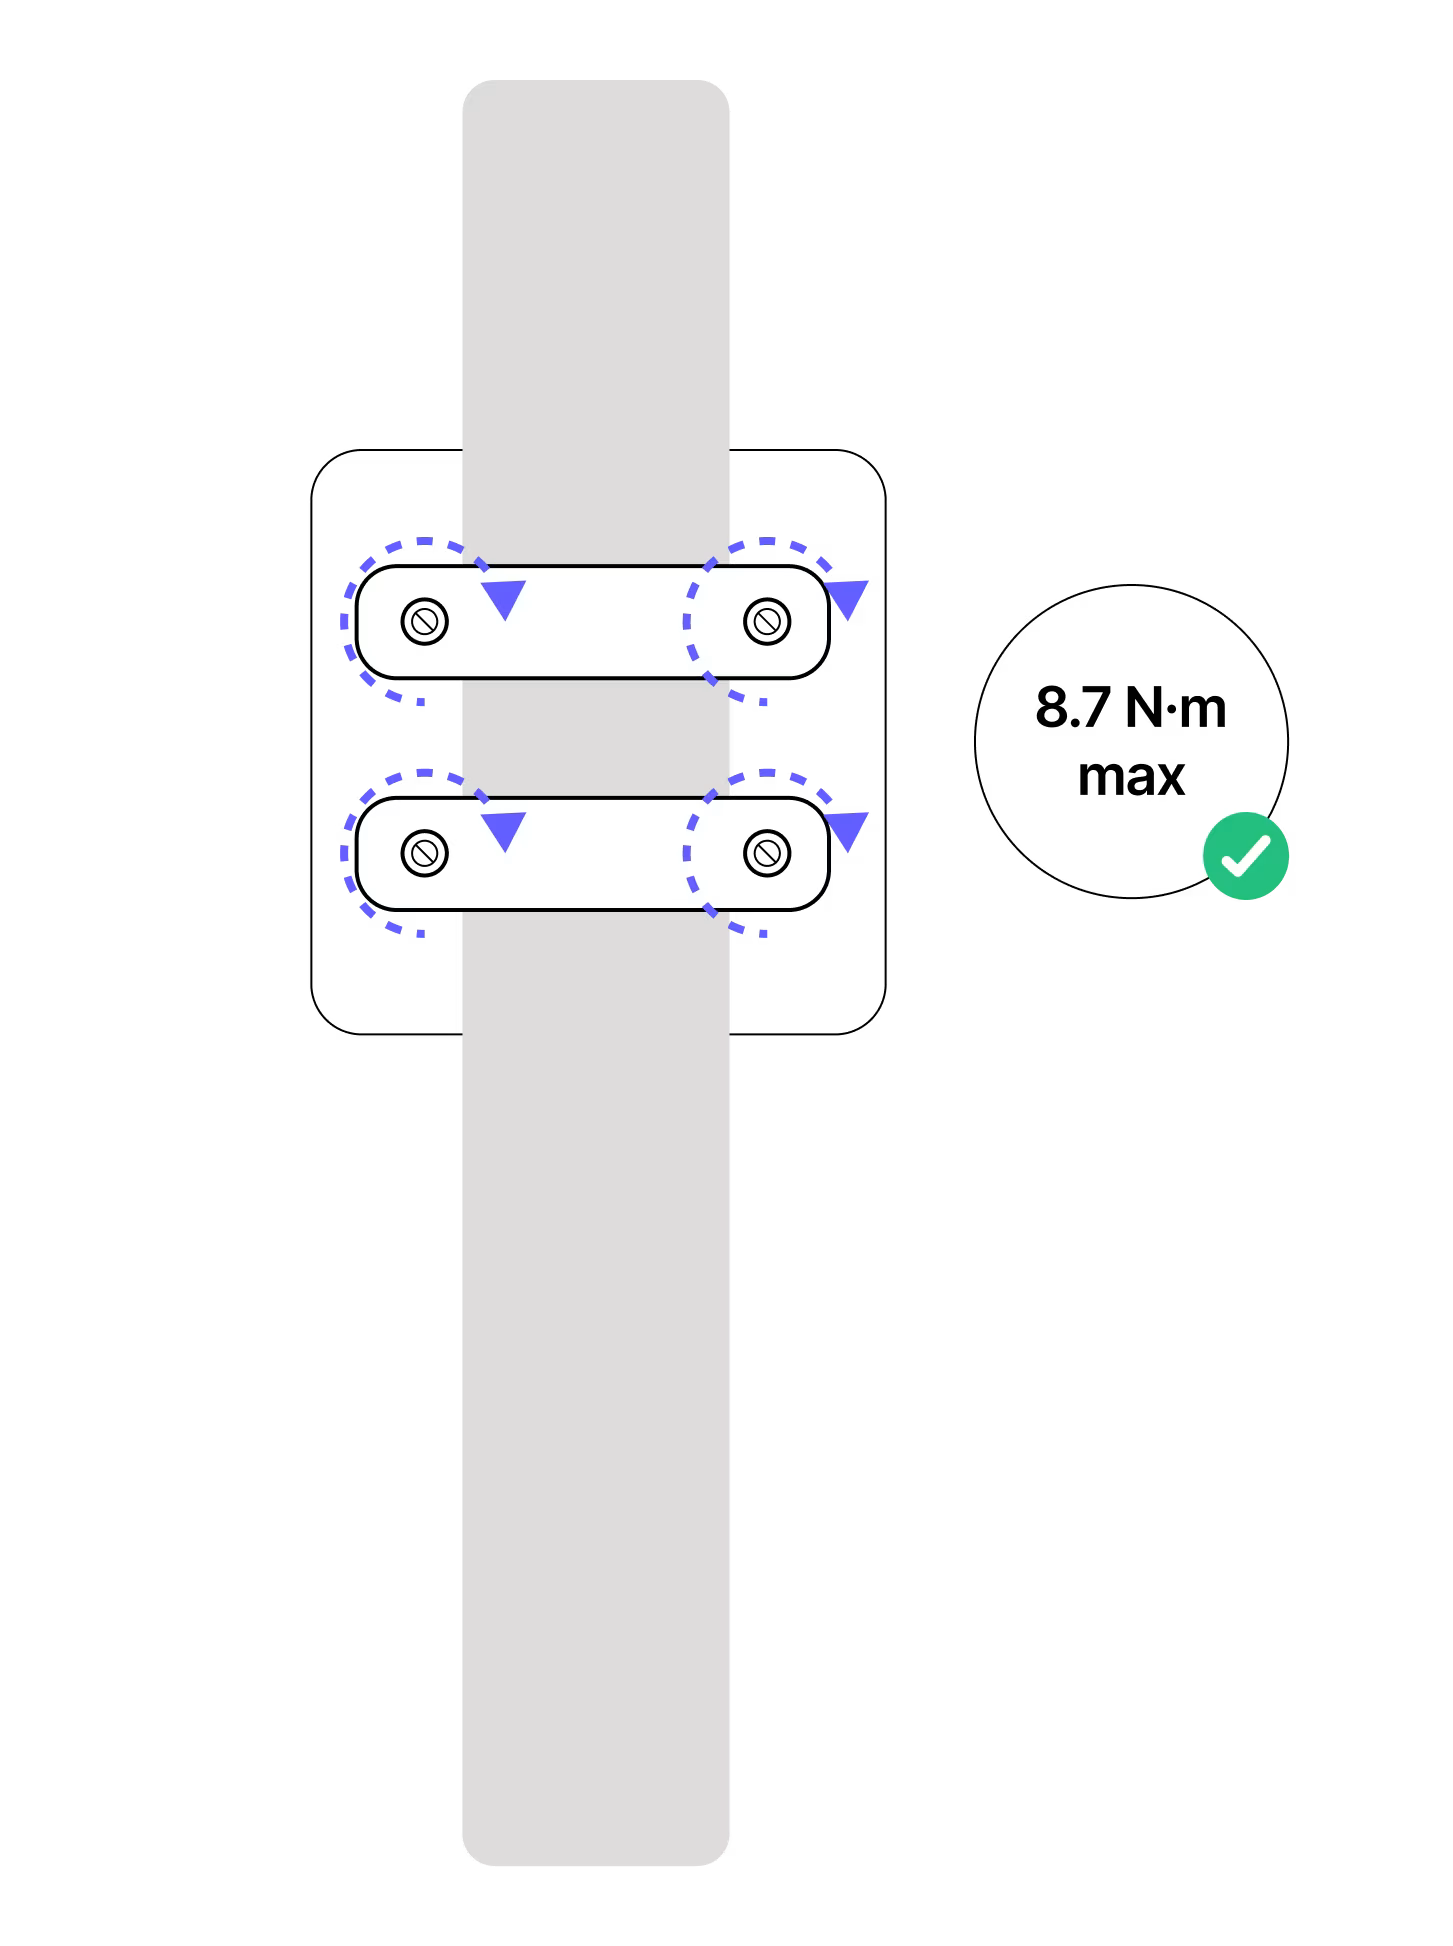
Step 14
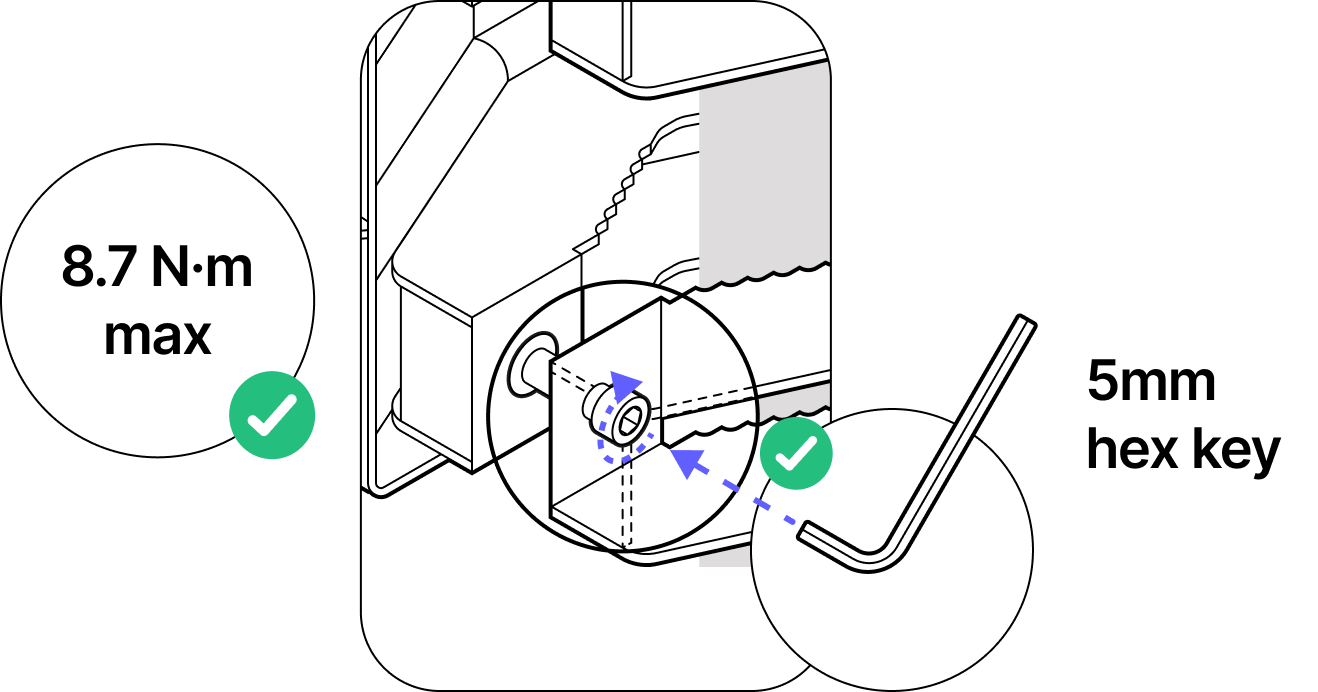
The bolts must be tightened to 8.7 N-m with an appropriate torque wrench.
Tips:
Verify that the six azimuth and elevation bolts
Verify the six azimuth and elevation locking bolts are loose and mid-travel before coarse pointing the mounting bracket.
Torque control
Ensure all fasteners are tightened to the specified torque 8.7 Newton meters (N-m) max to secure the mounting bracket in place.
Electrical safety
If the equipment is connected to a power source, ensure it is de-energized before installation to avoid electric shock.
GPS app
Use your GPS app and communicate with your teammate to verify each other's position.
Do not remove the dust caps from the WOC terminal until you are ready to plug in the Octis connectors.
Last updated: April 2026