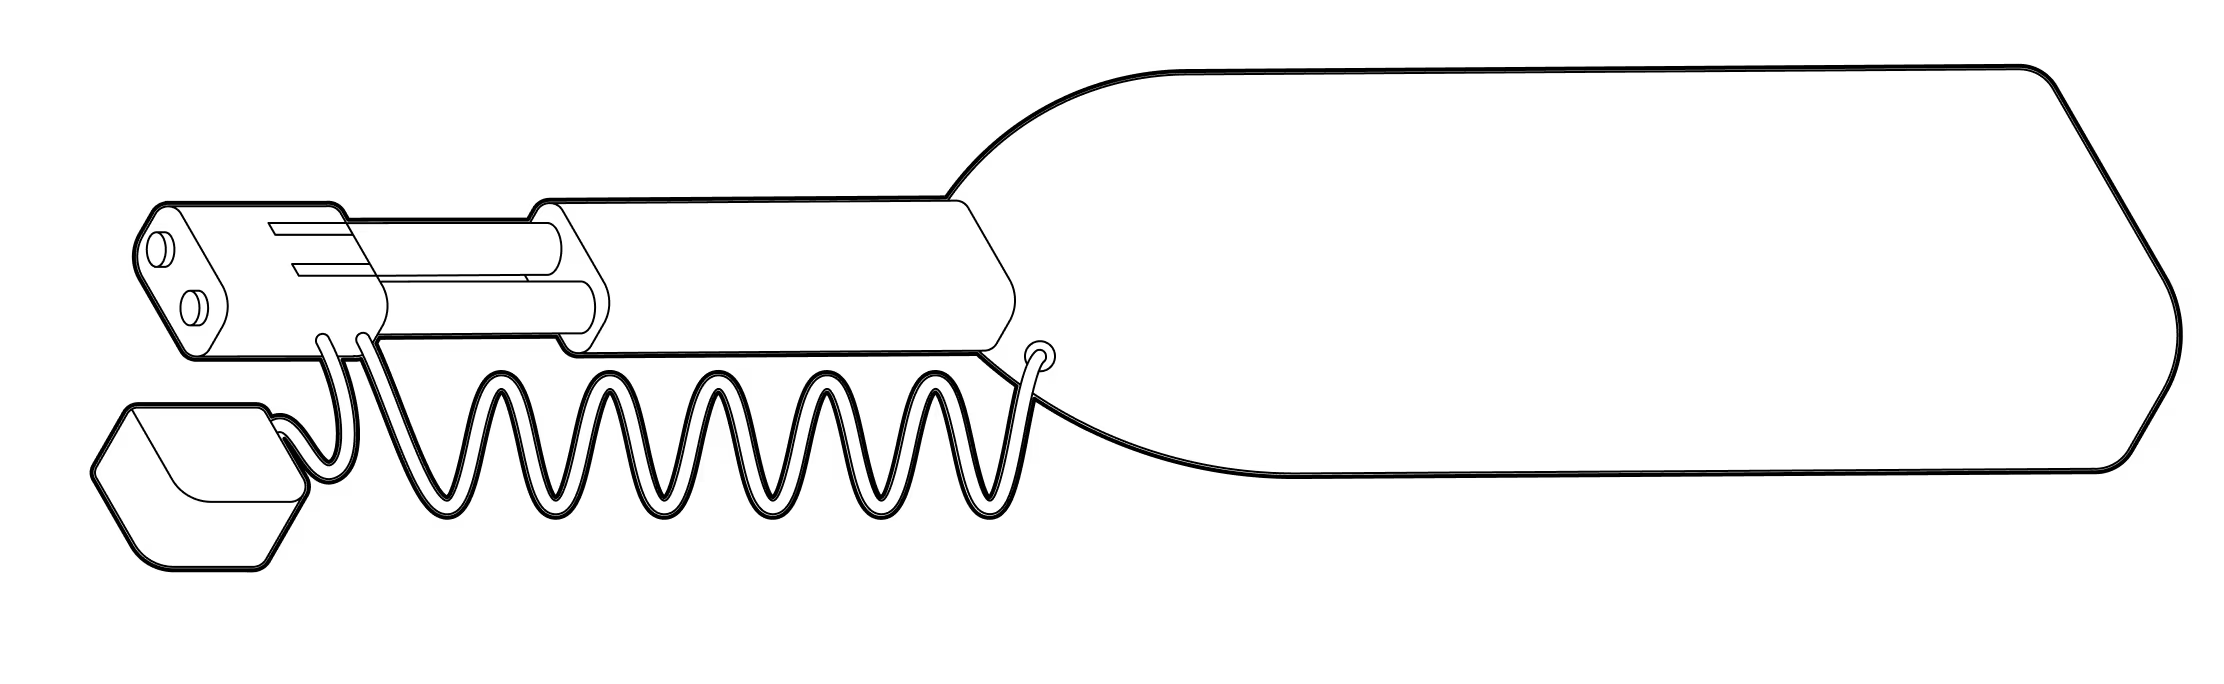
Parts List

- a
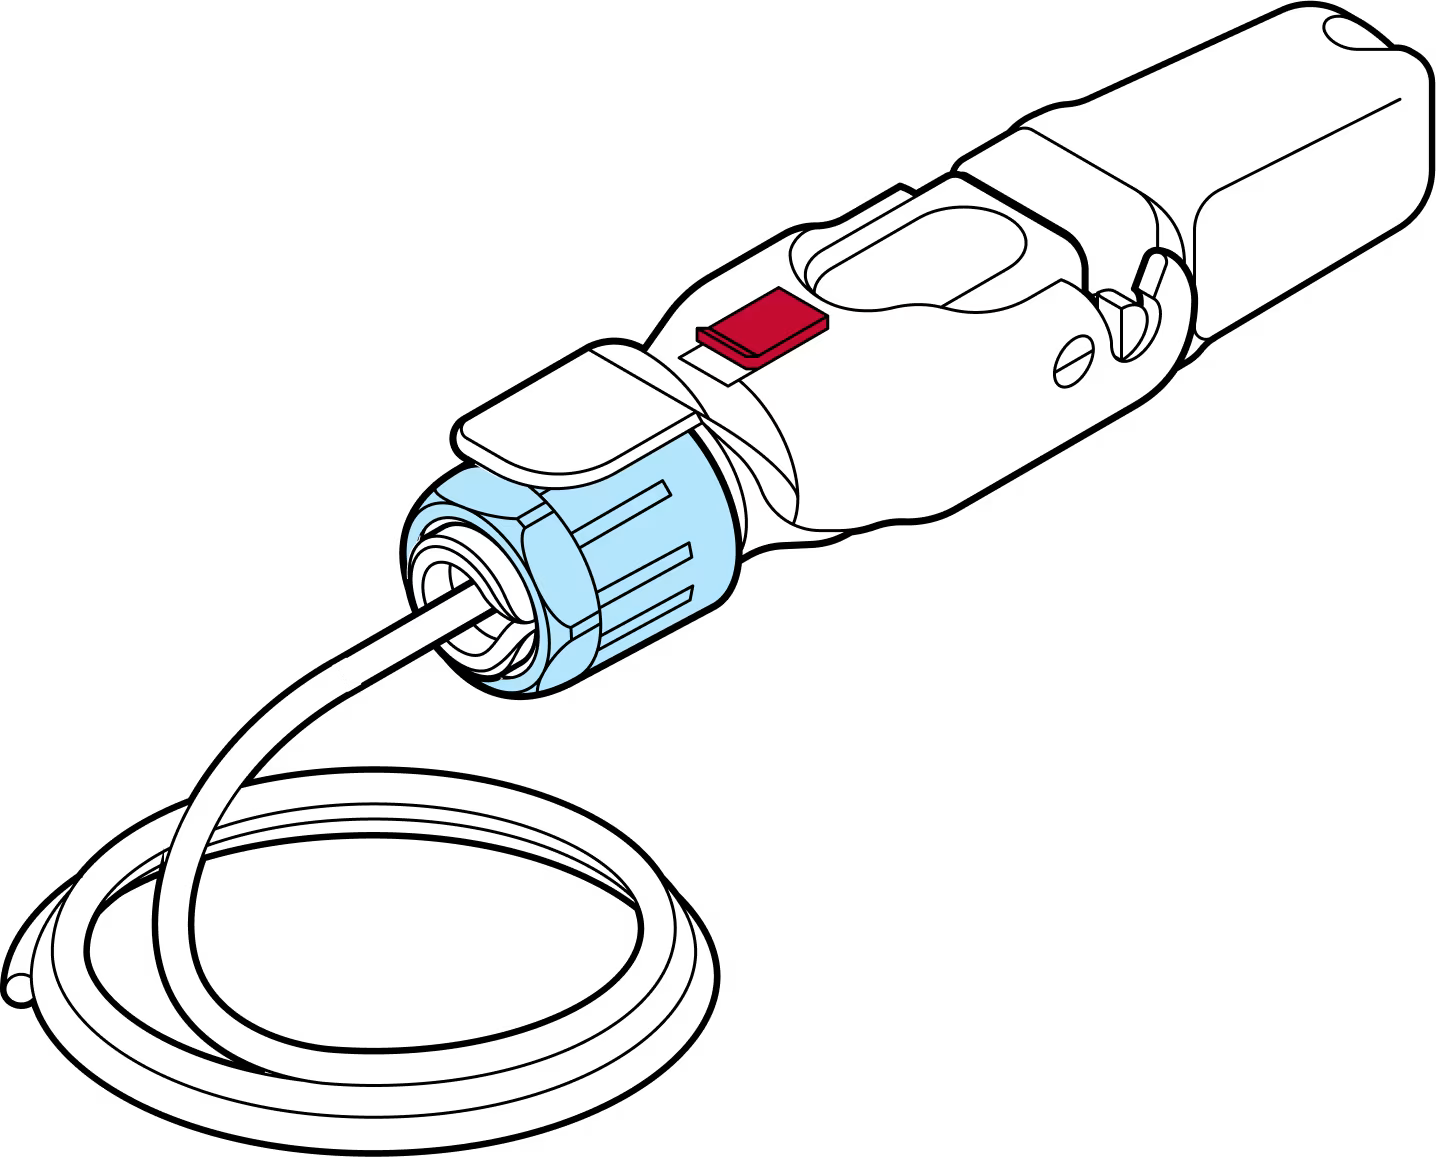
Blue gland nut
- b
Tightening cone
- c
Split rubber gland
- d
Housing
- e
Fiber optic cable
- f
SFP module
- g
SFP module holder
- h
Plug cap
Required Tools
LC Fiber cleaner
Assembly

Installation
Step 1
Make sure that the dust caps are on the connector and remain on until the connector is ready to be cleaned and plugged in.

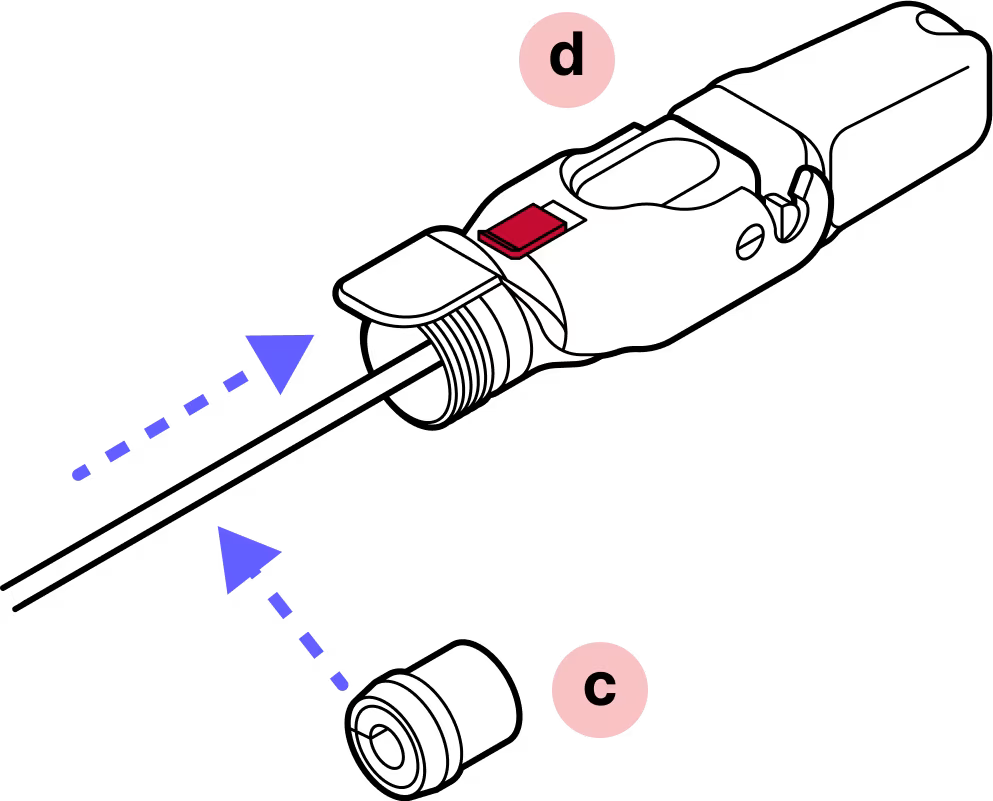
Step 2
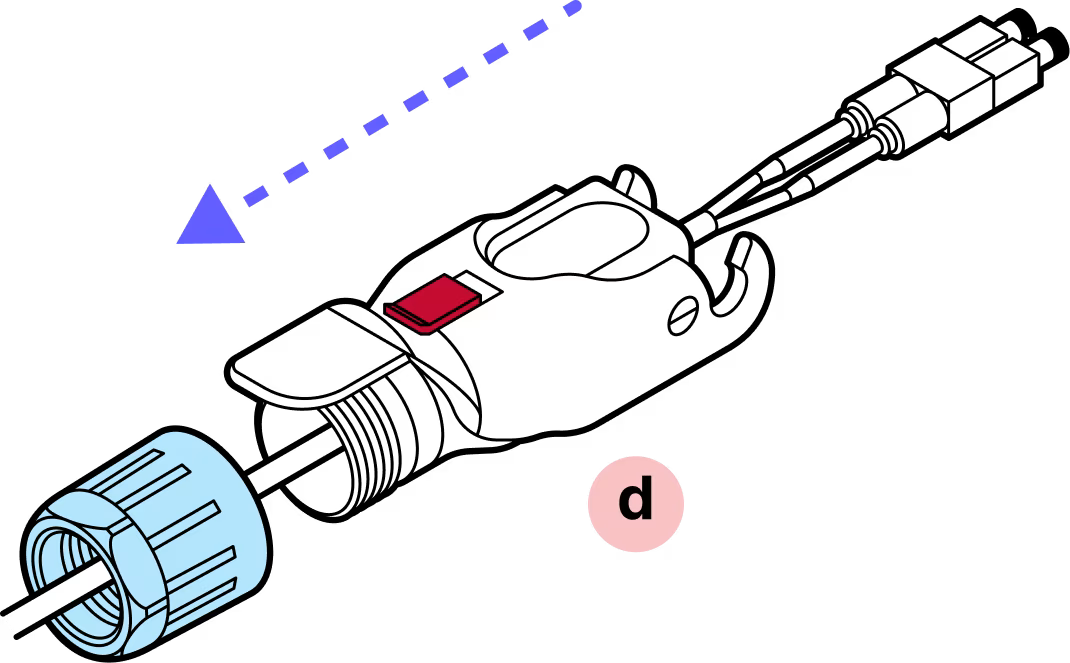
Slide the blue nut and the outer Octis housing over the cable.
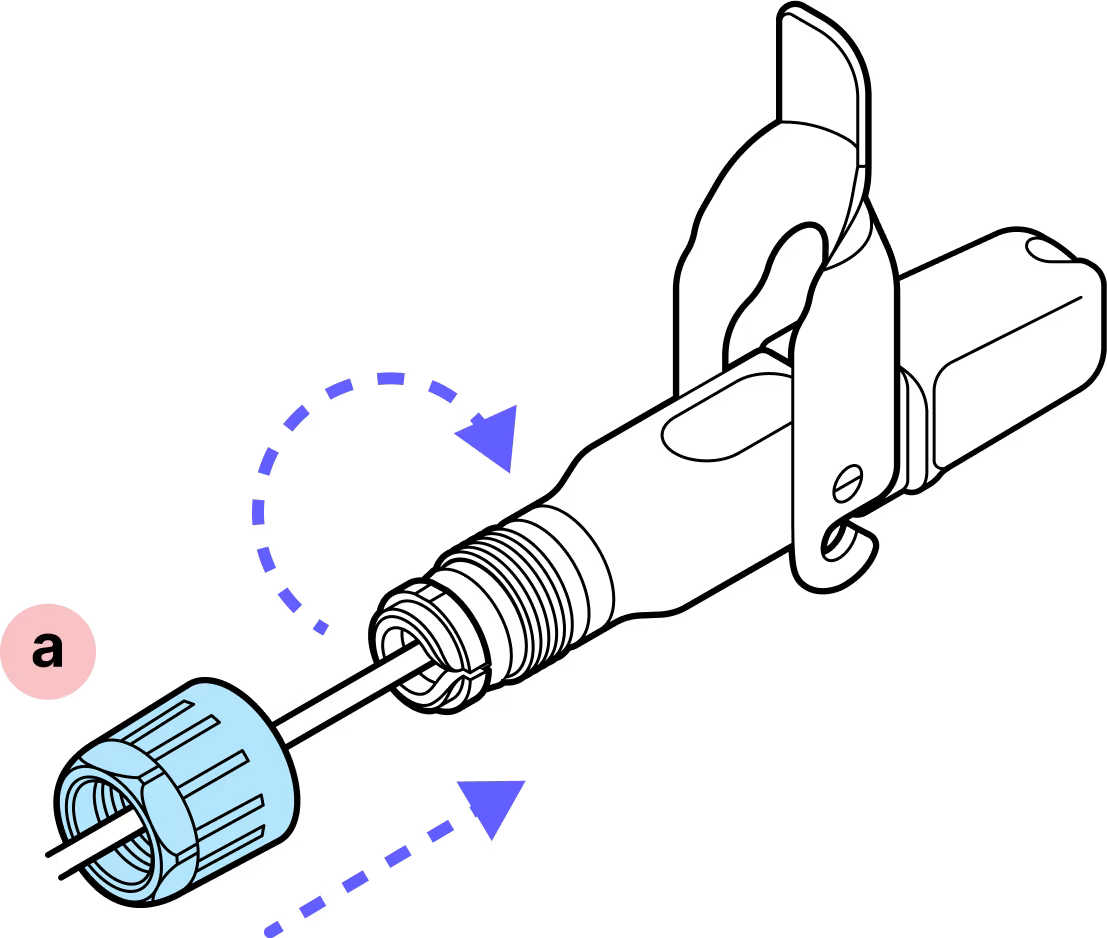
Step 3
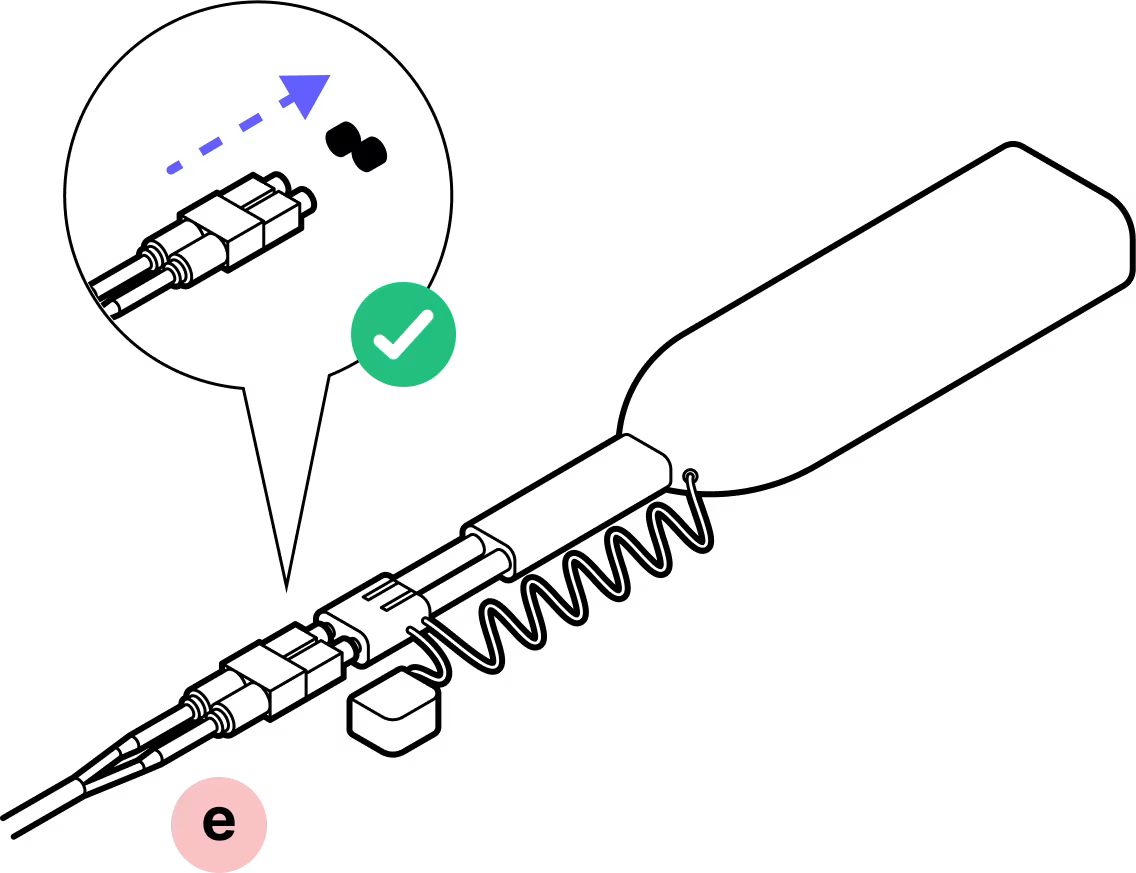
Remove the dust cap and clean the fiber connectors. DO NOT touch the fiber connectors with your fingers.
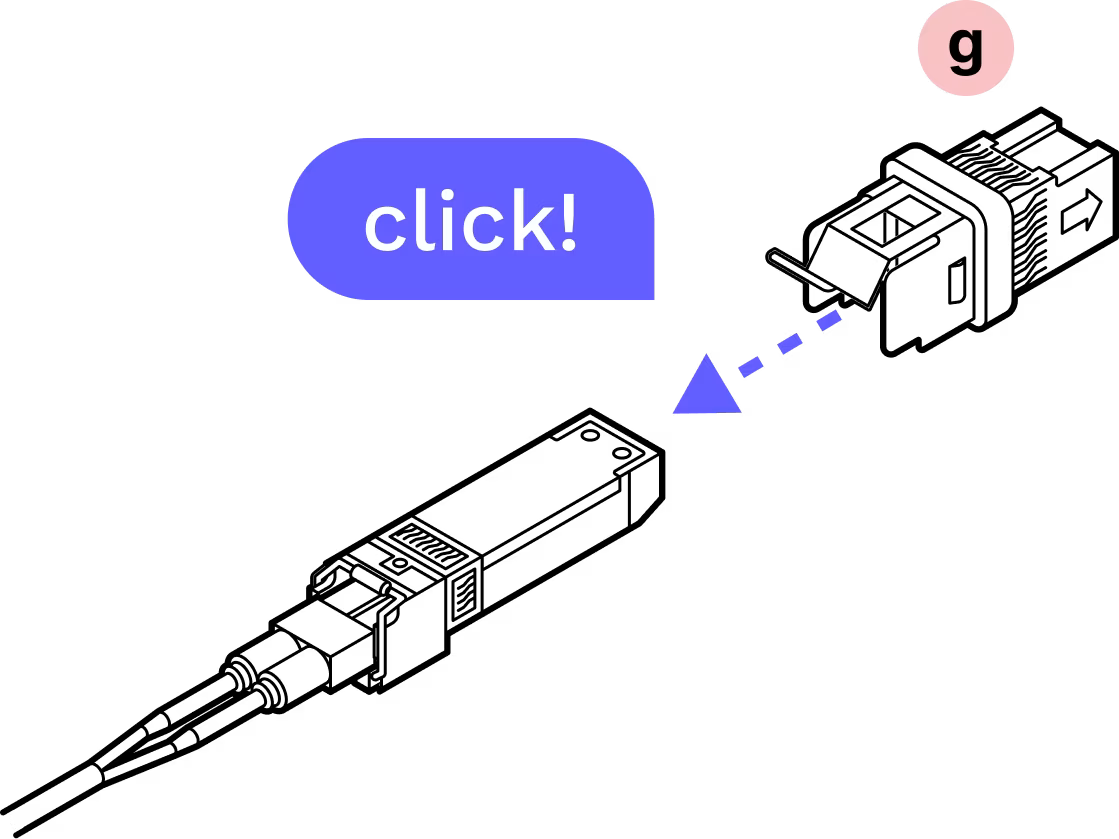
Step 4
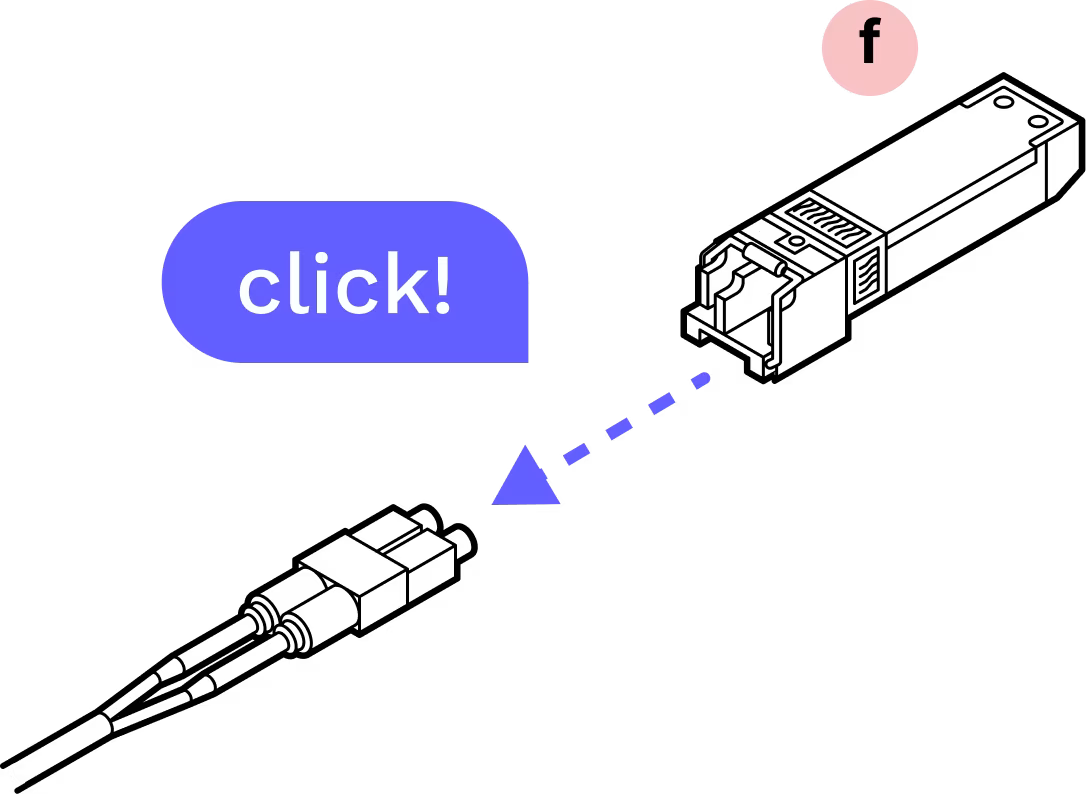
Plug the connector into the SFP until you hear a click.
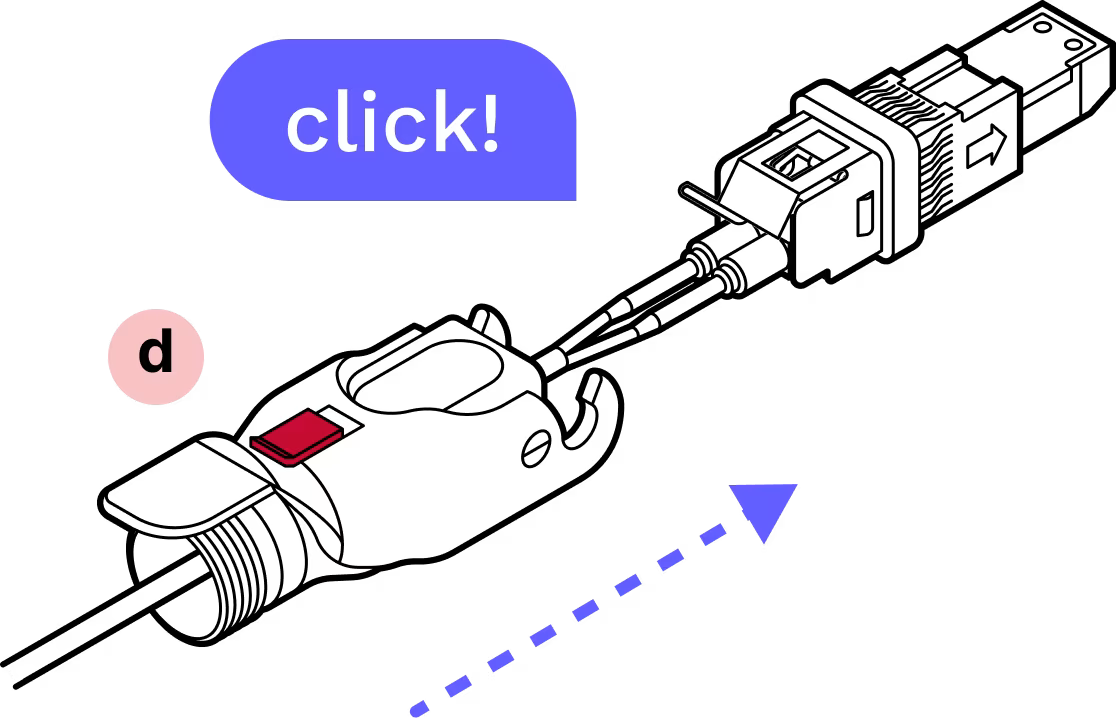
Step 5
With the metal tab on top in-line with the tab on the fiber assembly, gently insert the assembly into the inner housing until it clicks into place.
Step 6
With the arrows on the corners of the outer and inner housing lining up, slide the plastic housing onto the metal housing until you hear a click.
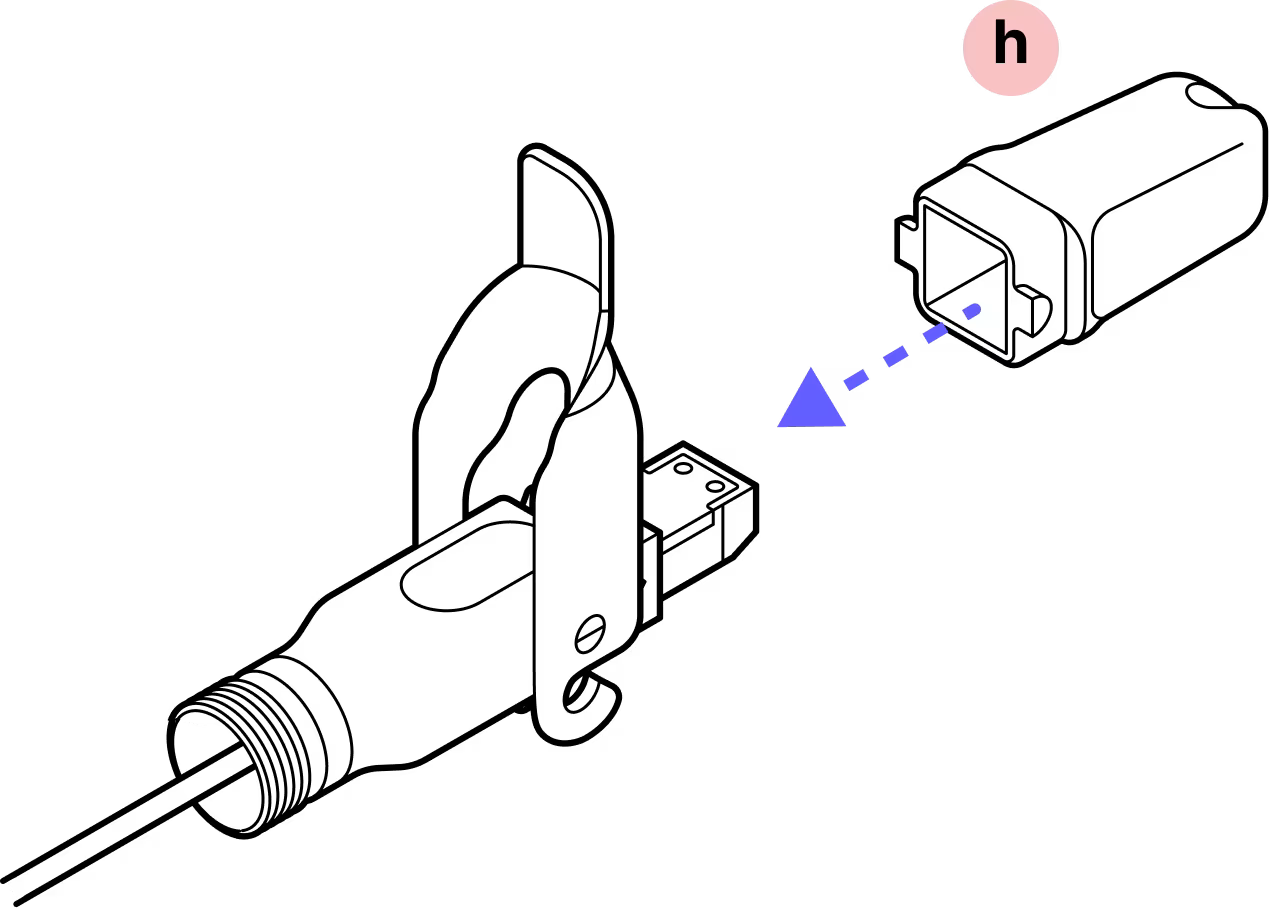
Step 7
Attach the plastic cap and lock the hinge to ensure that everything stays aligned and in place.
Step 8
Slide the split rubber gland onto the cable in the proper orientation and into the cylindrical portion of the Octis housing. If the cable has label bands, slide them down so they are not pushed into the Octis housing.
Step 9
Slide the tightening cone over the cable in the proper orientation.
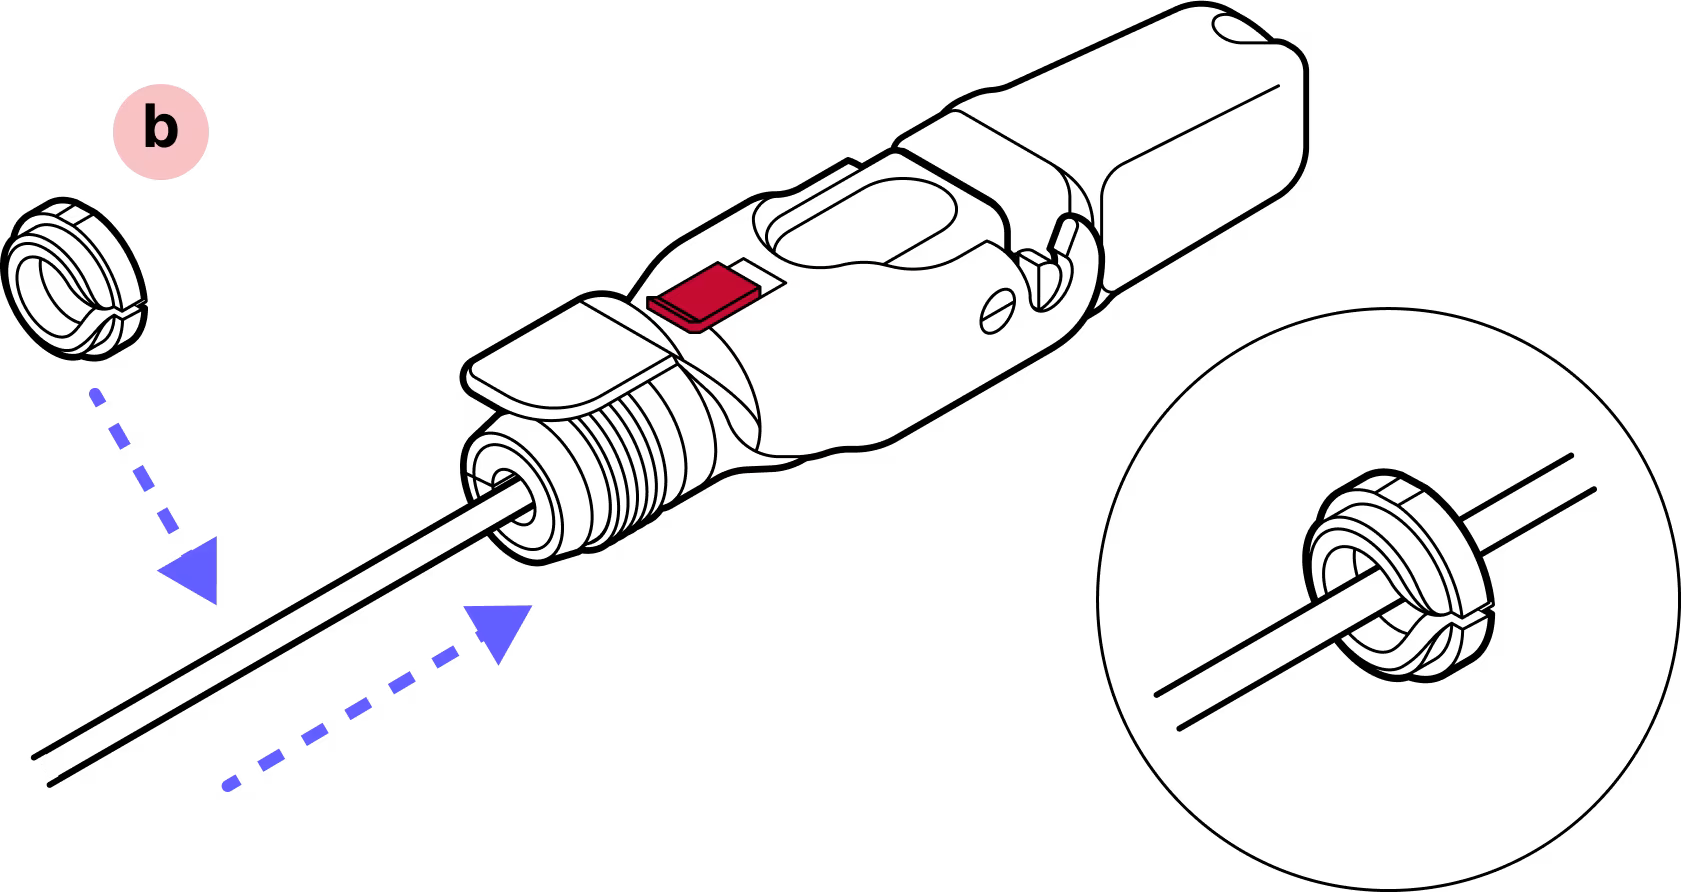
Step 10
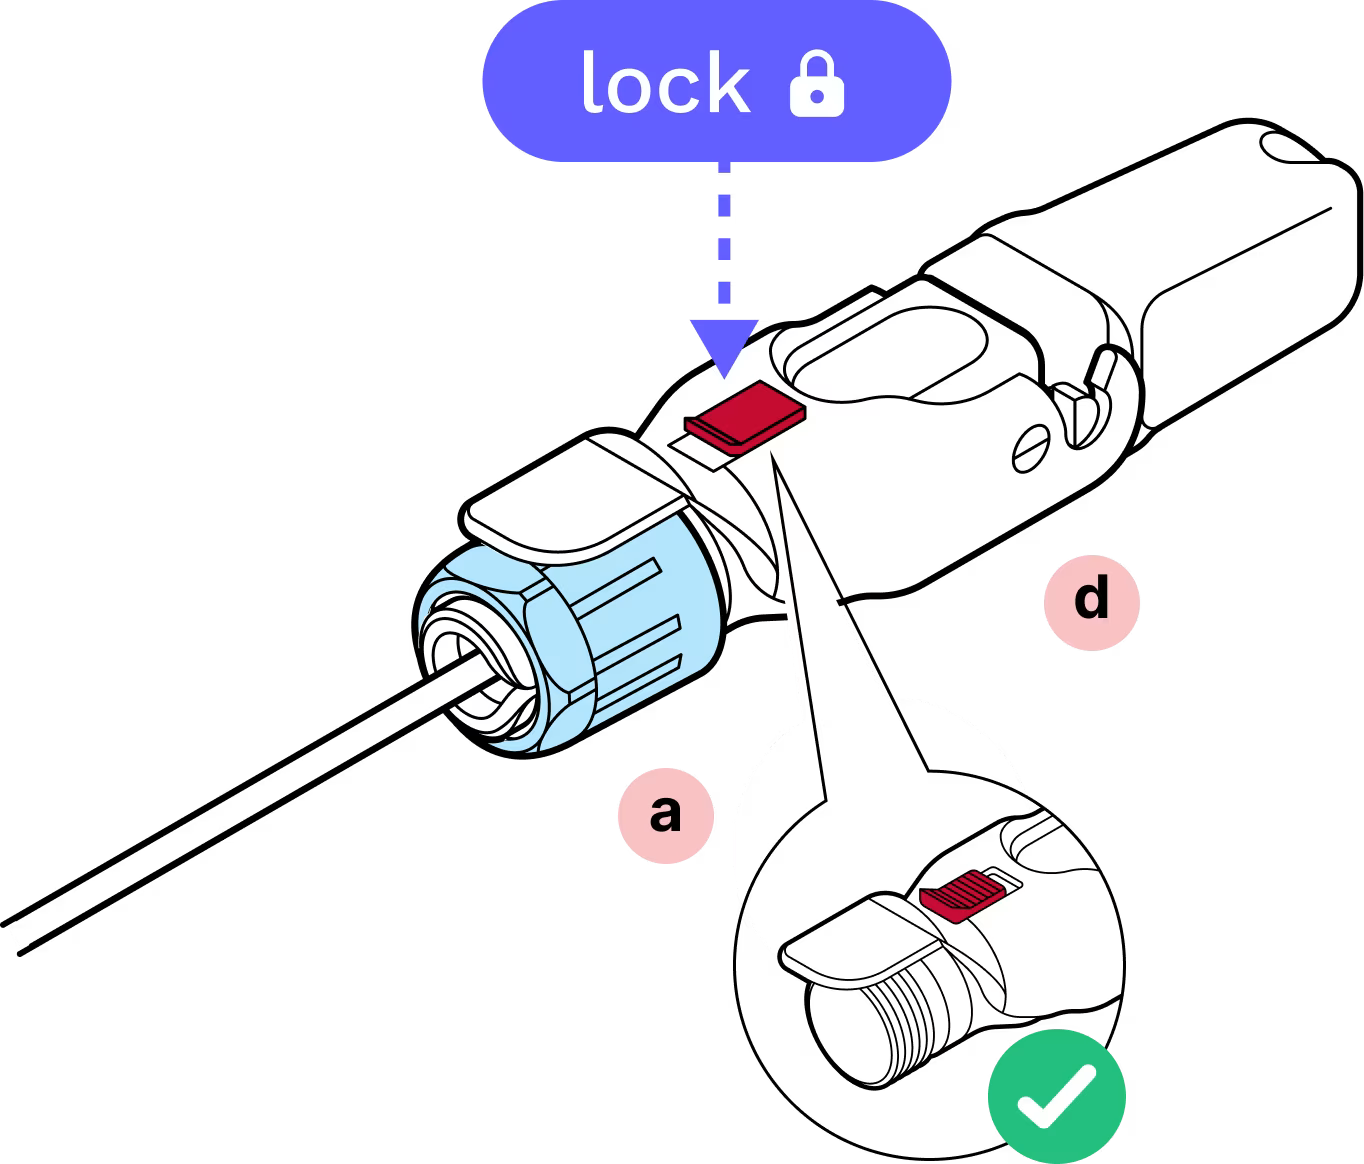
Screw the blue gland nut into place. IMPORTANT: The gland nut must be tightened so that the red slide lock catches on its edge when in the locked position. DO NOT OVER-TIGHTEN.
Step 11
Remove the dust cap.
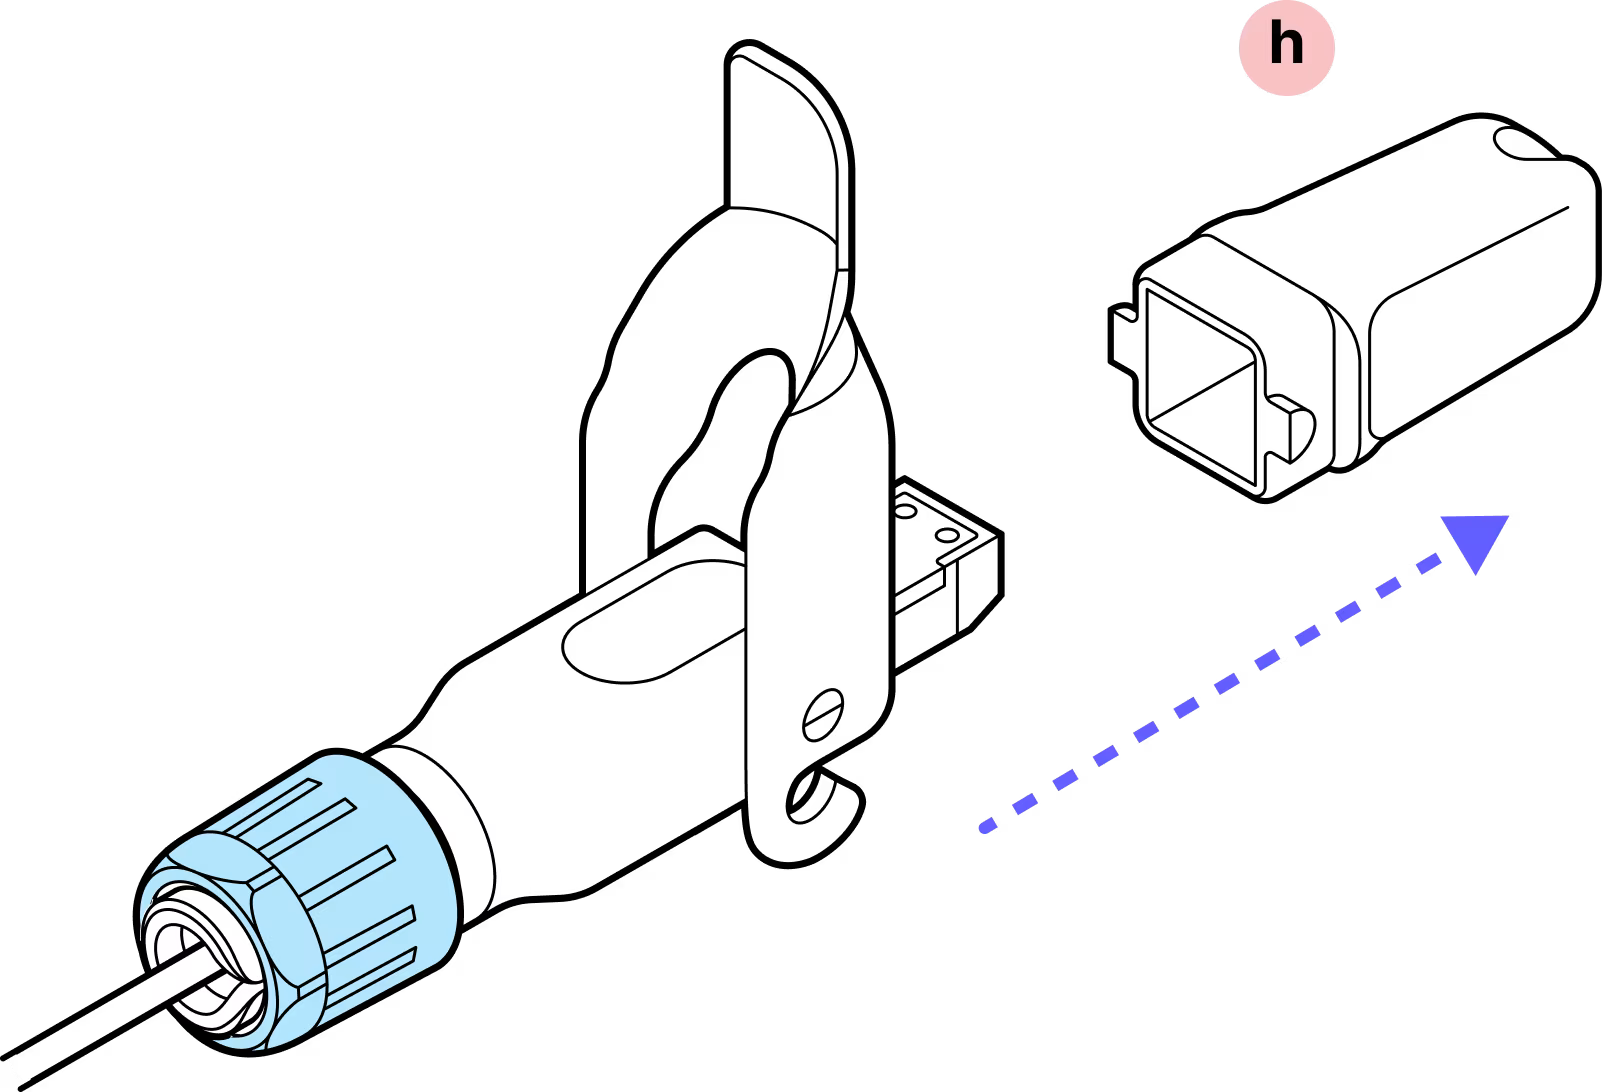
Step 12
Press gently on the SFP ensuring that it does not slide into the connector body. If it does, this means the metal housing was not pressed on until it clicked. Disassemble and begin again from Step 5.

Step 13
Replace the dust cap.
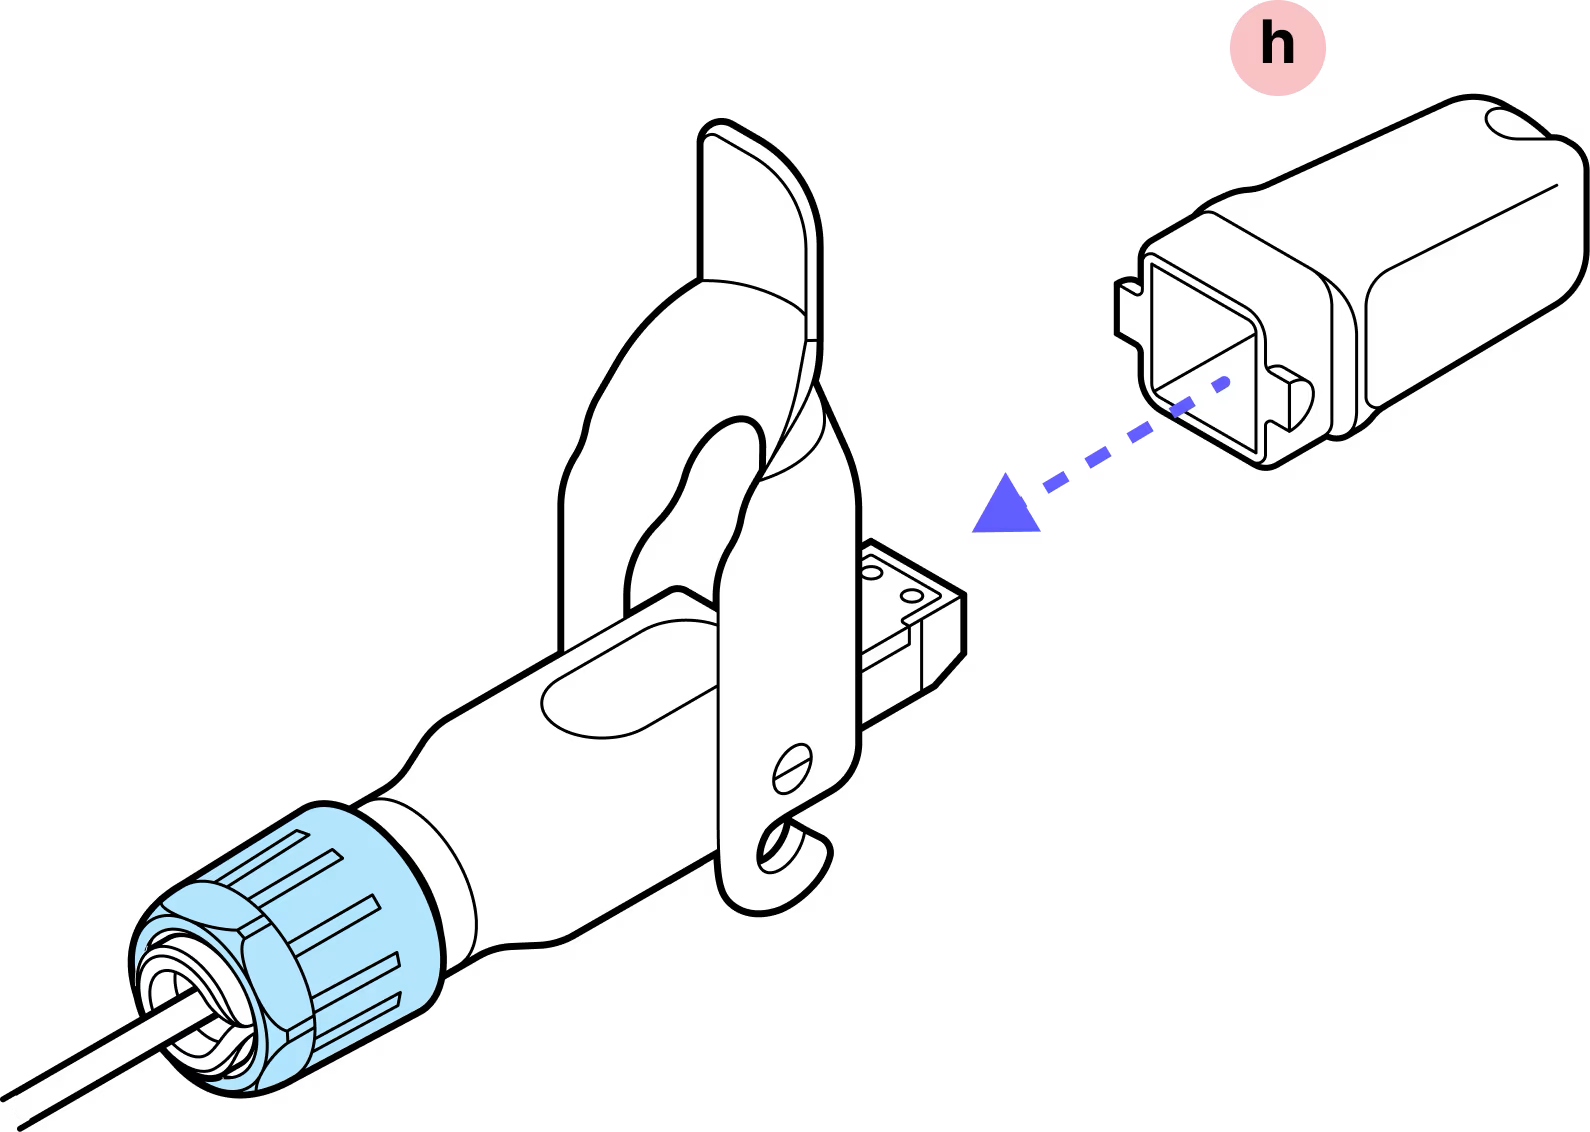
Step 14
Lock the red slide lock. IMPORTANT: When closing the hinged lock, the red lock MUST be in the UNLOCKED position. Do not force the hinge lock down or you may break the red slide lock.
Complete!
Tips:
Ensue proper fiber cable handling
Good practice involves careful handling and management of the fiber assembly. Use a plug to protect the cable from dust. Use of a fiber cleaning tool before connecting is highly recommended.
Listen for the clicks
As you assemble the components, make sure to listen for the distinctive 'click' sounds, which indicate that the parts are securely connected. These clicks provide an audible confirmation that the assembly is properly sealed.
Gently press down to check
Verify the SFP is locked in place by applying finger pressure.
Do not remove the dust caps from the WOC terminal until you are ready to plug in the Octis connector.
Last updated: April 2026