Parts List
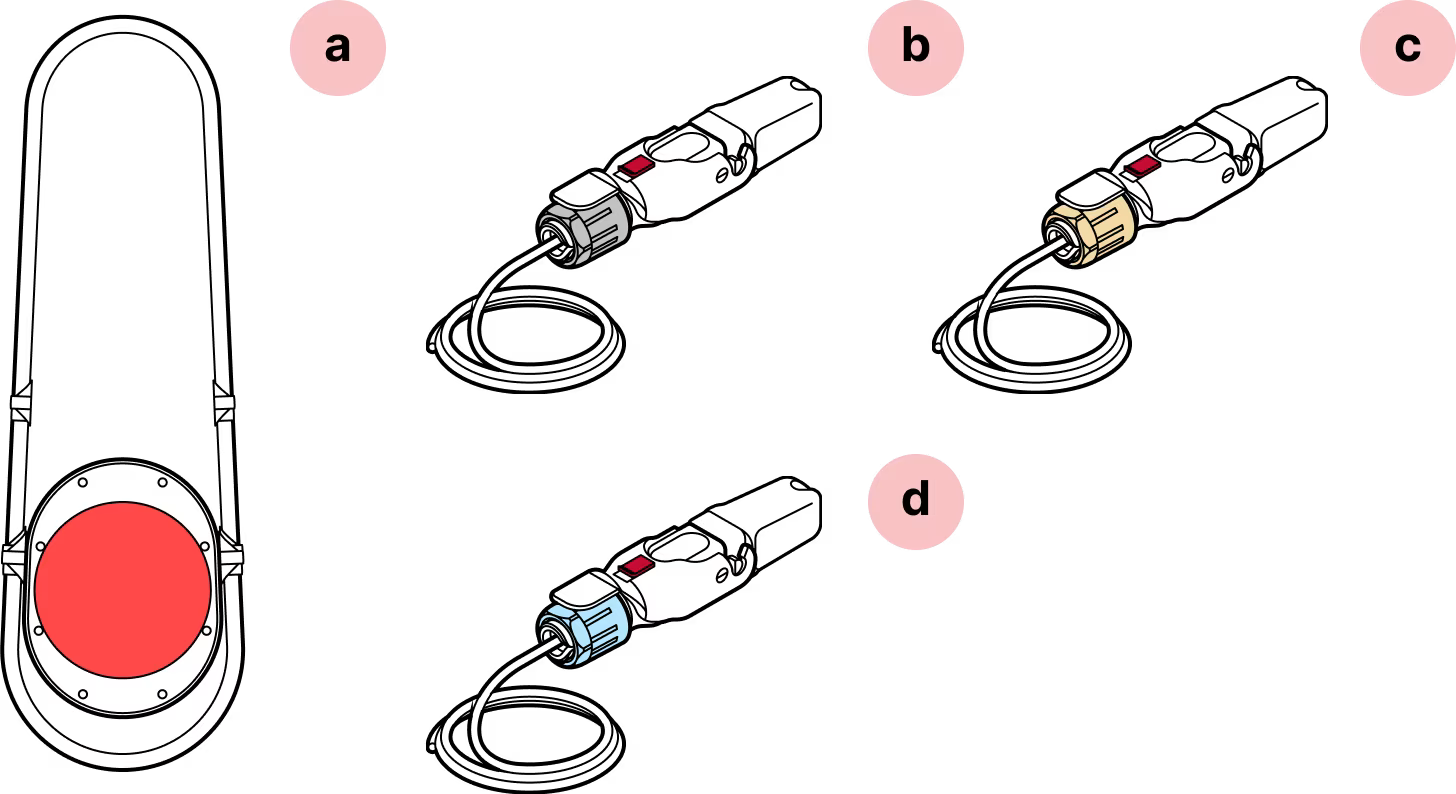
- a
WOC Terminal
- b
Assembled Octis RJ45
- c
Assembled Octis DC
- d
Assembled Octis SFP(s)
Required Tools
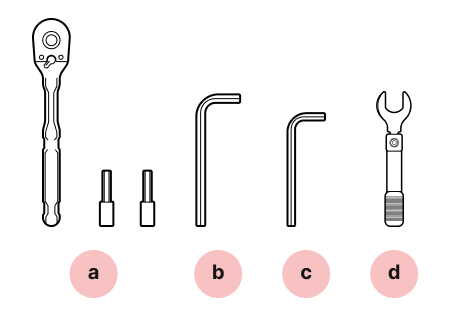
- a
¼-inch ratchet and sockets
- b
6 mm hex key
- c
5 mm hex key
- d
Torque wrench (not provided)
Safety
Do not power on the terminal before it is fully mounted.
Avoid working in strong winds or unfavorable weather conditions.
Make sure that the terminal is securely attached to the fasteners.
Do not touch the window
Keep all dust caps and lens covers in place until the terminal is mounted and pointed. Avoid touching the window beneath the red lens cover.
Important
Do not install with any additional load or weight on cables or connectors.
Assembly Diagrams
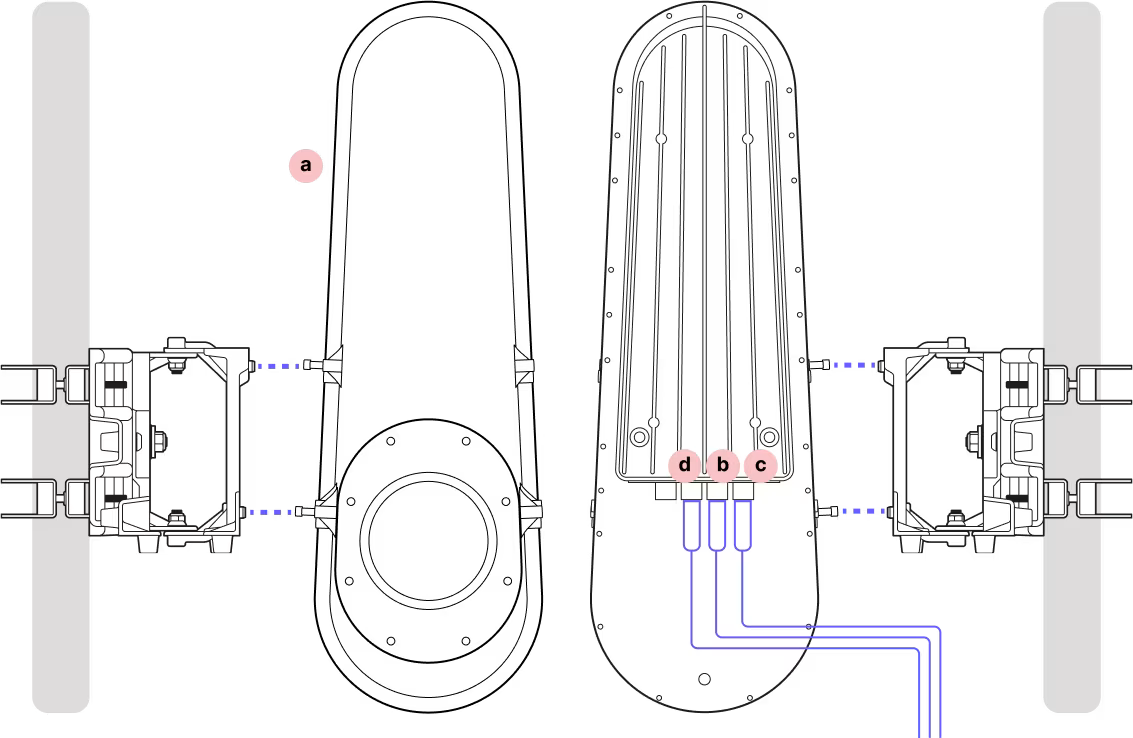
- a
WOC Terminal
- b
Assembled Octis RJ45
- c
Assembled Octis DC
- d
Assembled Octis SFP(s)
Installing the Terminal
Step 1
Do not remove the red lens cover until explicitly directed.

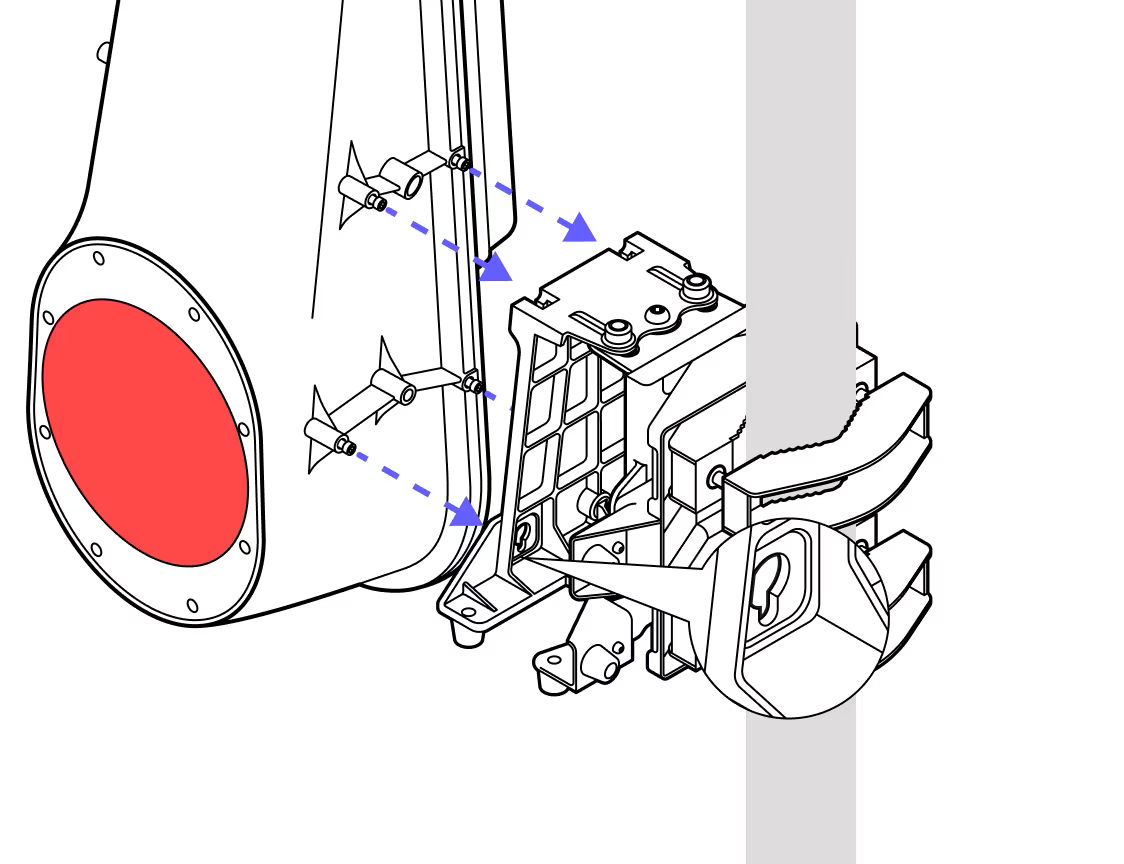
Step 2
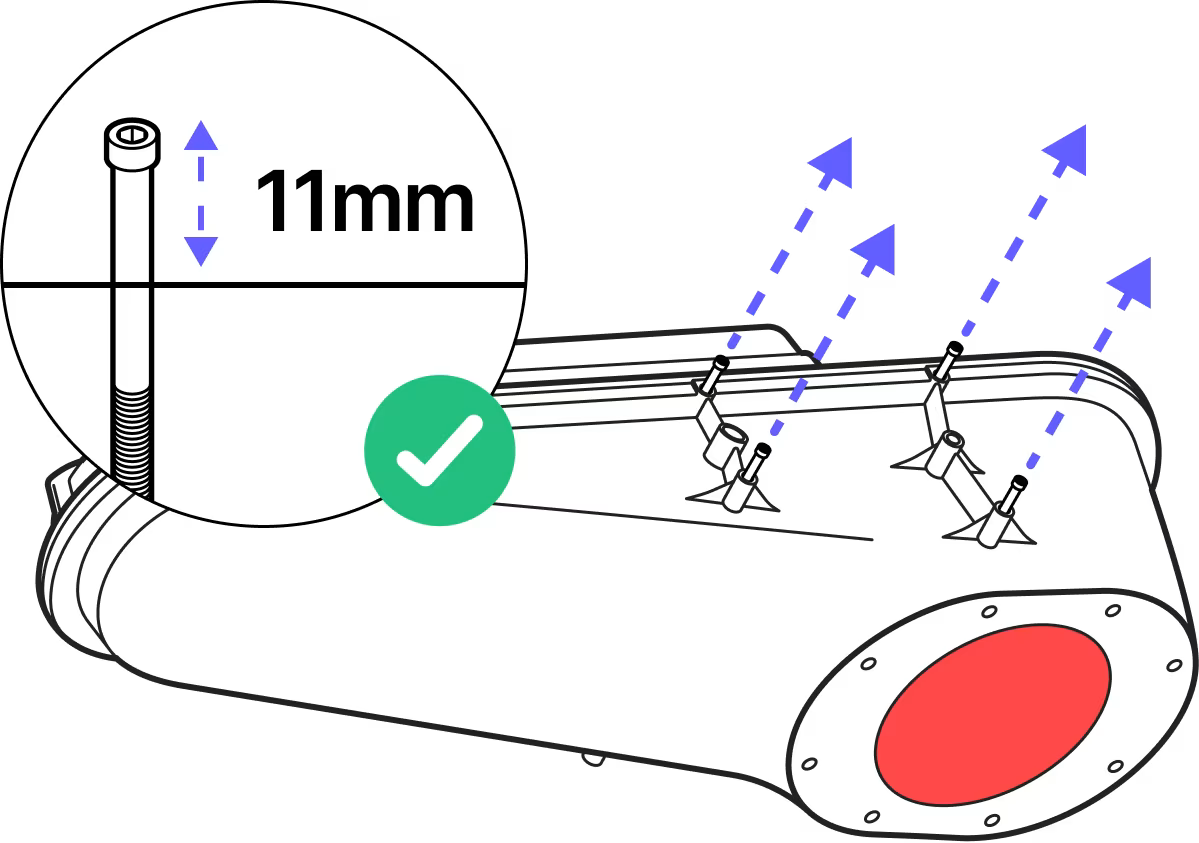
Back the pre-installed fasteners to 11mm thread depth to clear the guide pins on the mounting bracket.
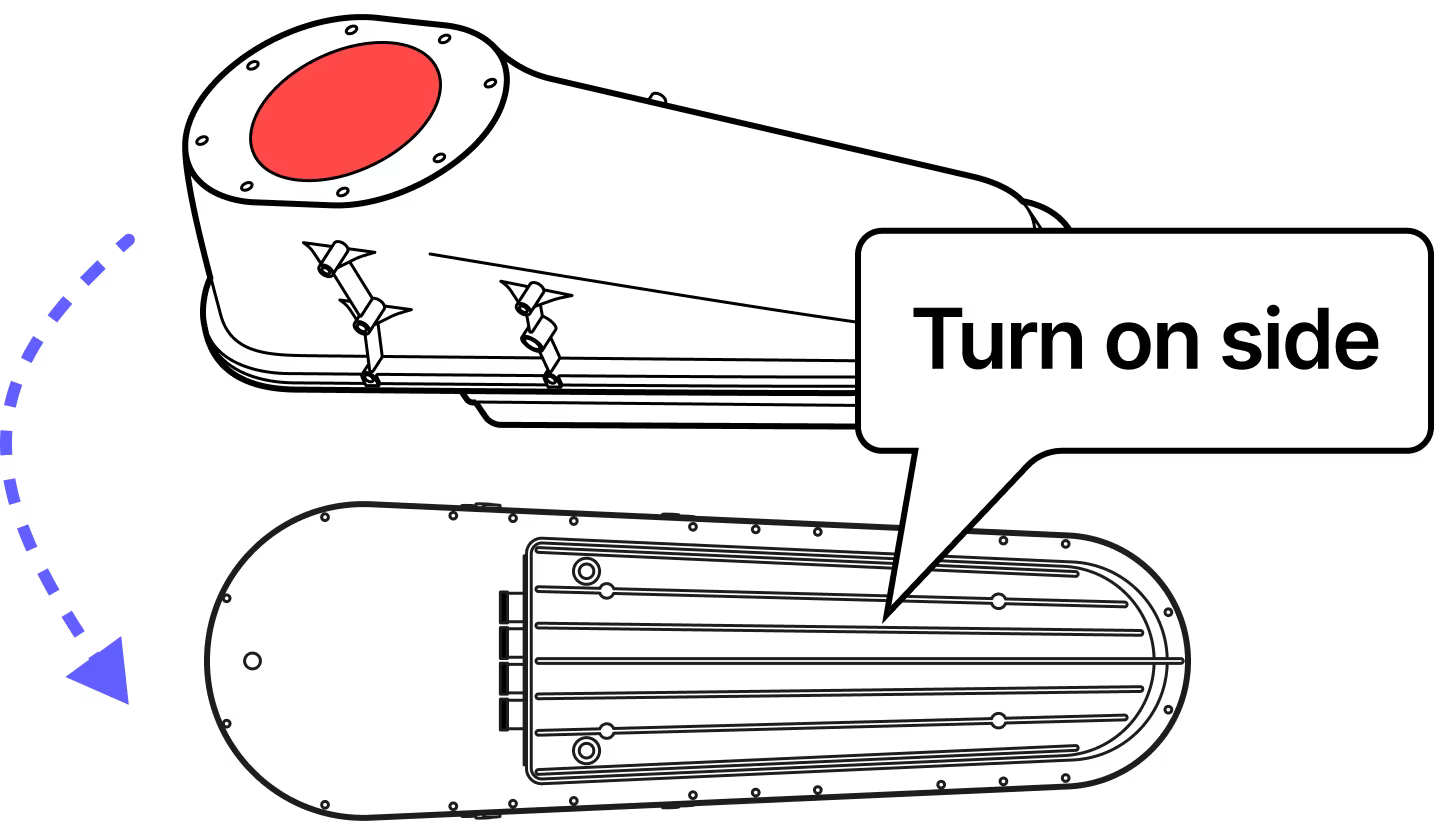
Step 3
Turn the terminal on its side and ensure the dust caps are still in place.
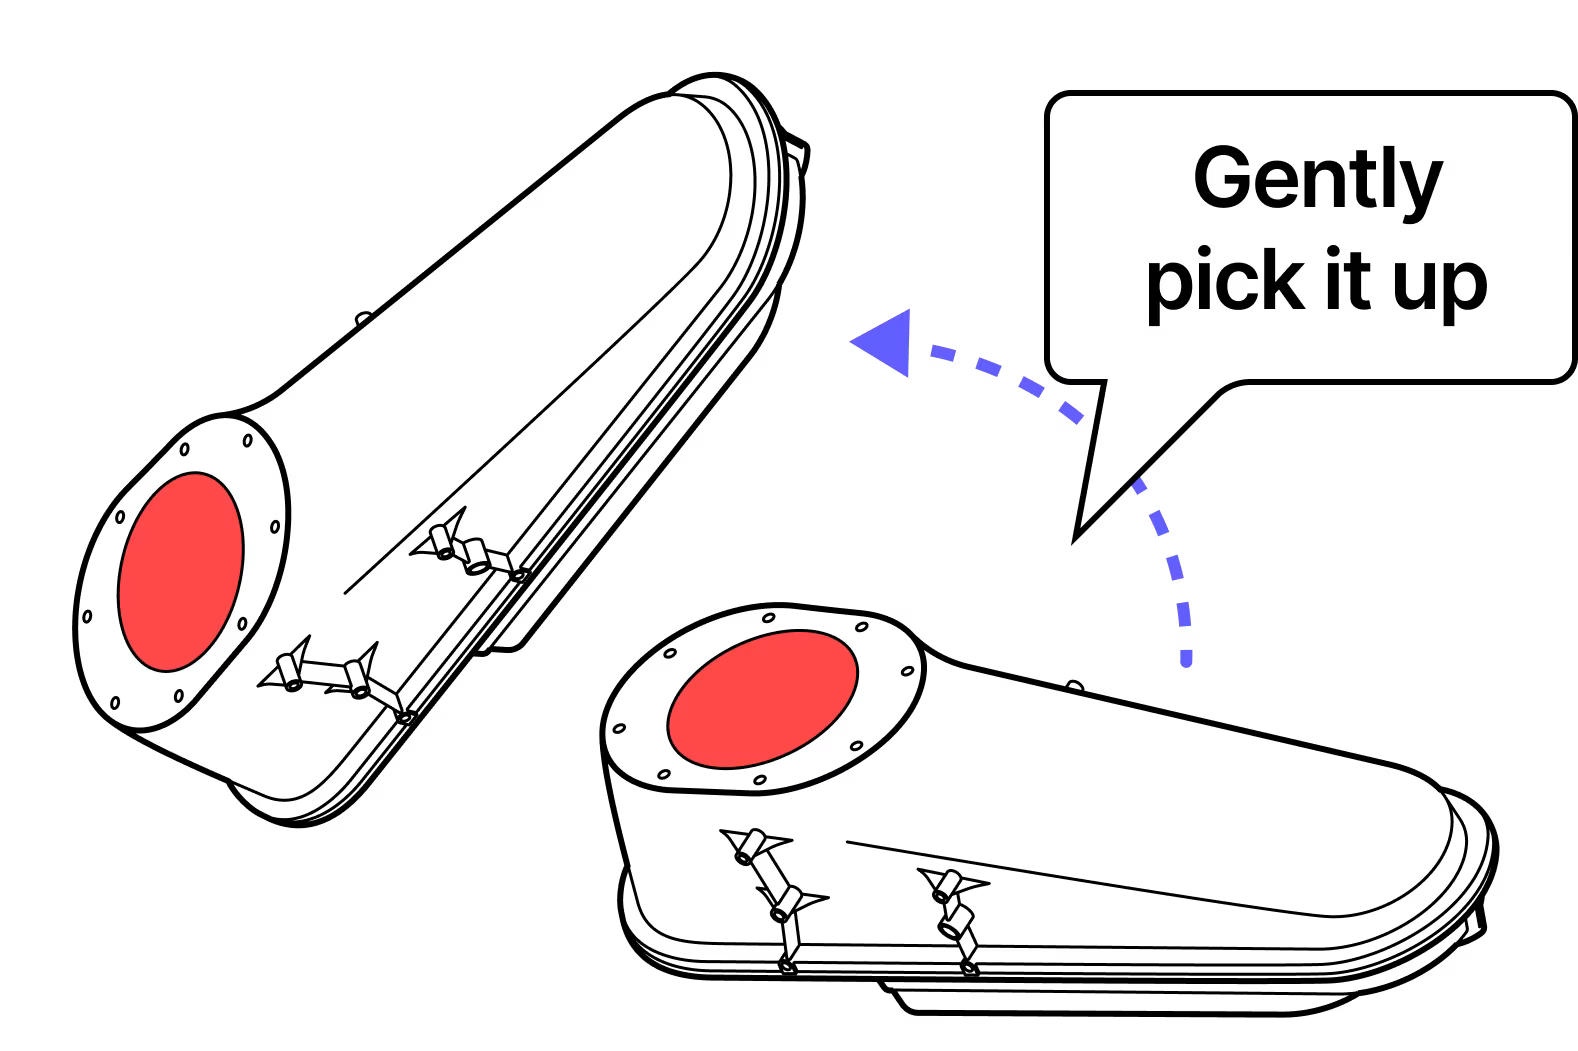
Step 4
Pick up the terminal gently. IMPORTANT: Handle the terminal with care throughout the mounting.
Step 5
Slide the fasteners into the round holes on the mounting bracket and down into the slots for the screws.
Step 6
Place one hand on the terminal and guide it into place as you tighten the four screws.
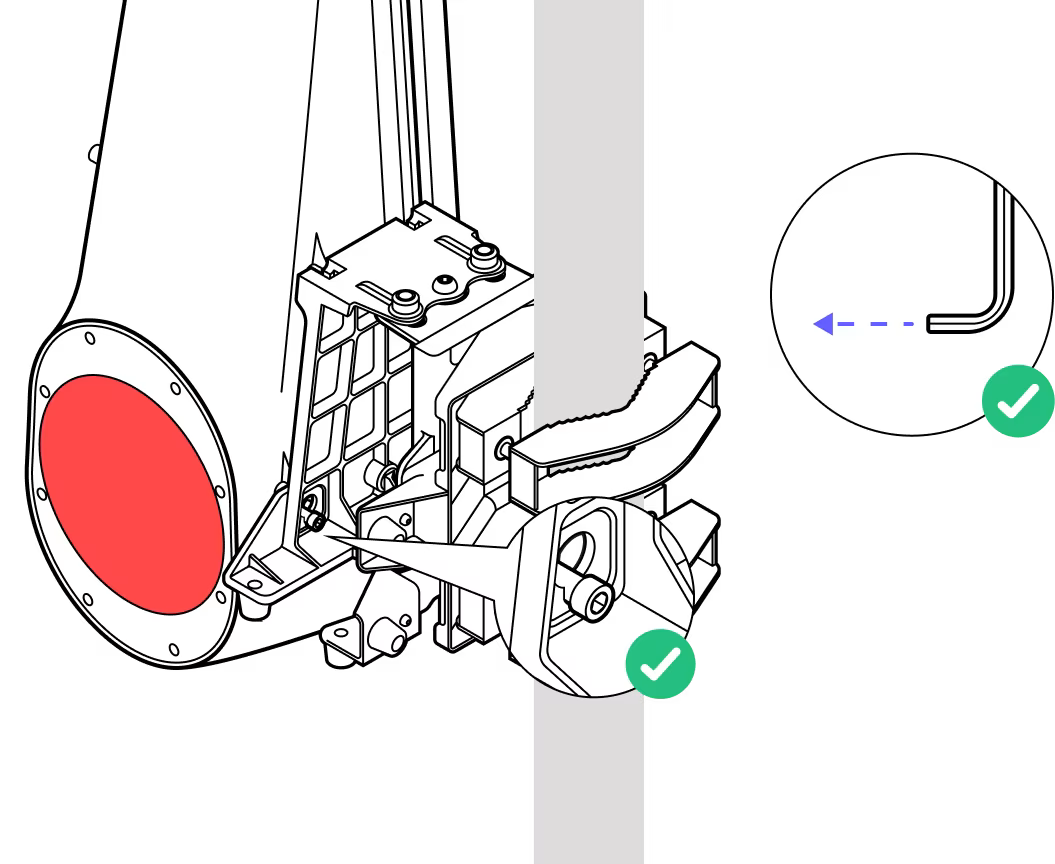
Step 7
Ensure all screws tighten and the terminal is flush to the bracket at all four locations. Screws should be tightened to a torque of 8.7 N-m.
Step 8
Prepare the Octis connectors to be plugged in. Do not remove the dust caps yet.
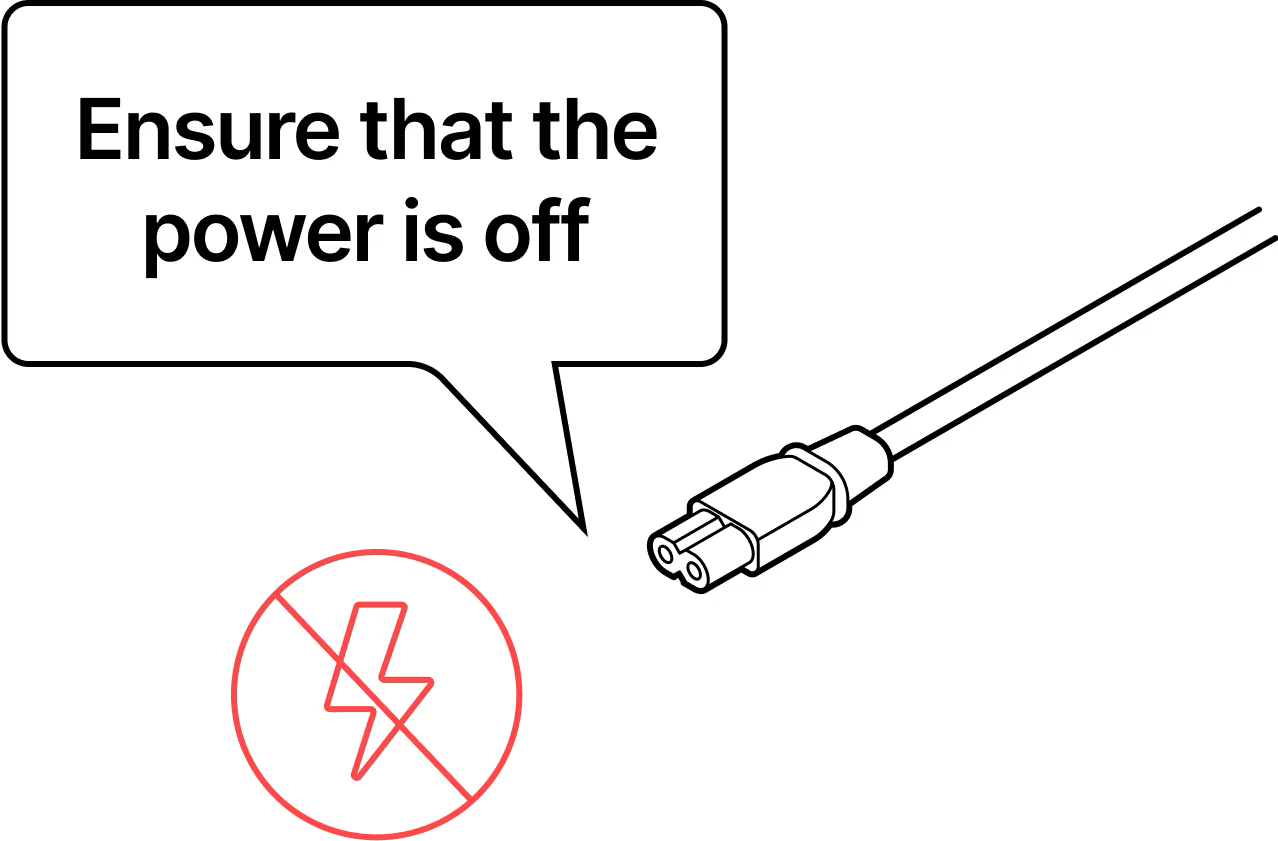
Step 9
Ensure that the unit is not powered and there is no power going to the DC cable.
Step 10
Remove the dust caps one by one. DO NOT remove all the dust caps at once.
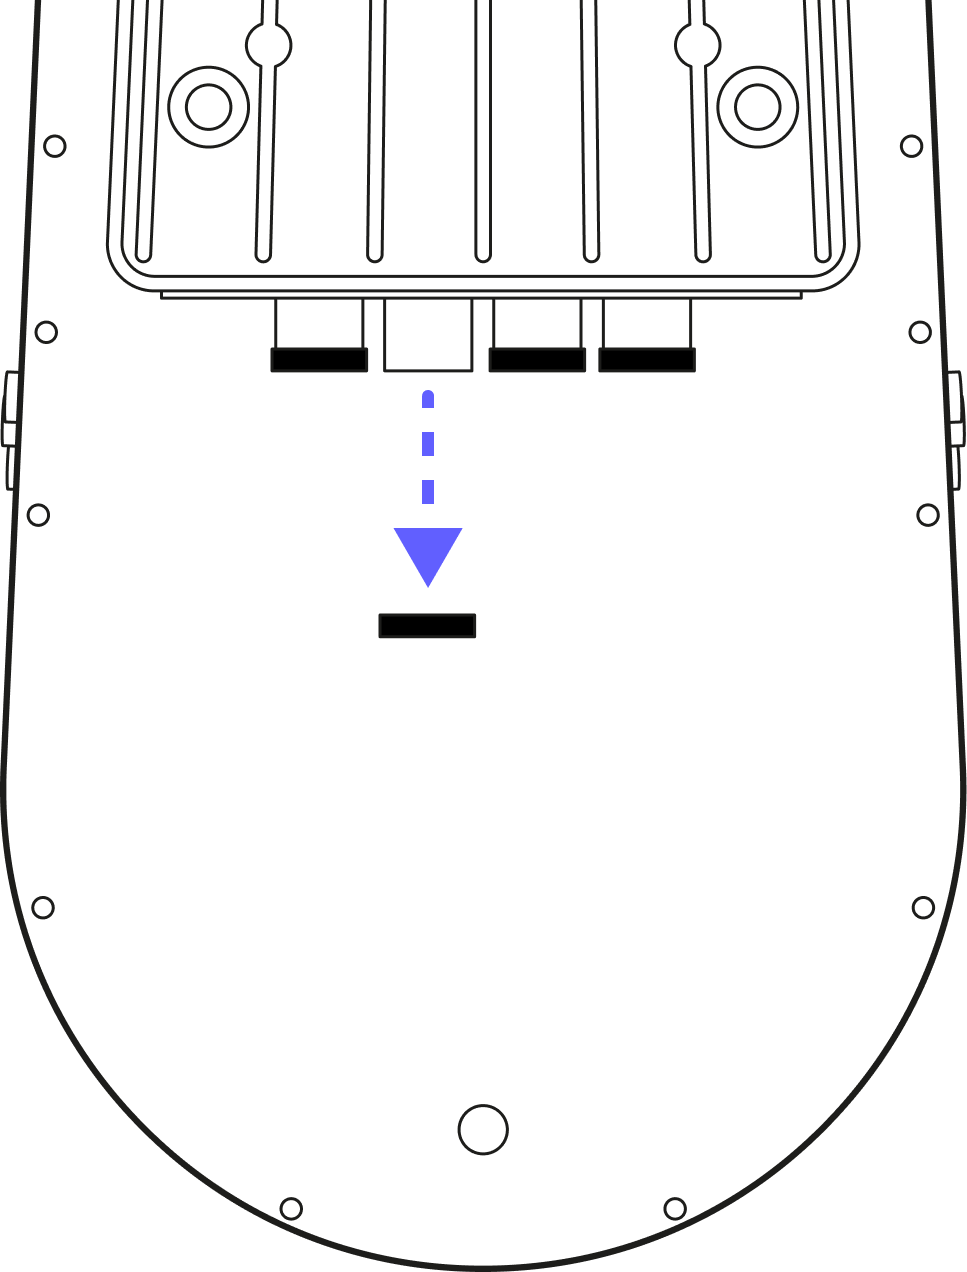
Step 11
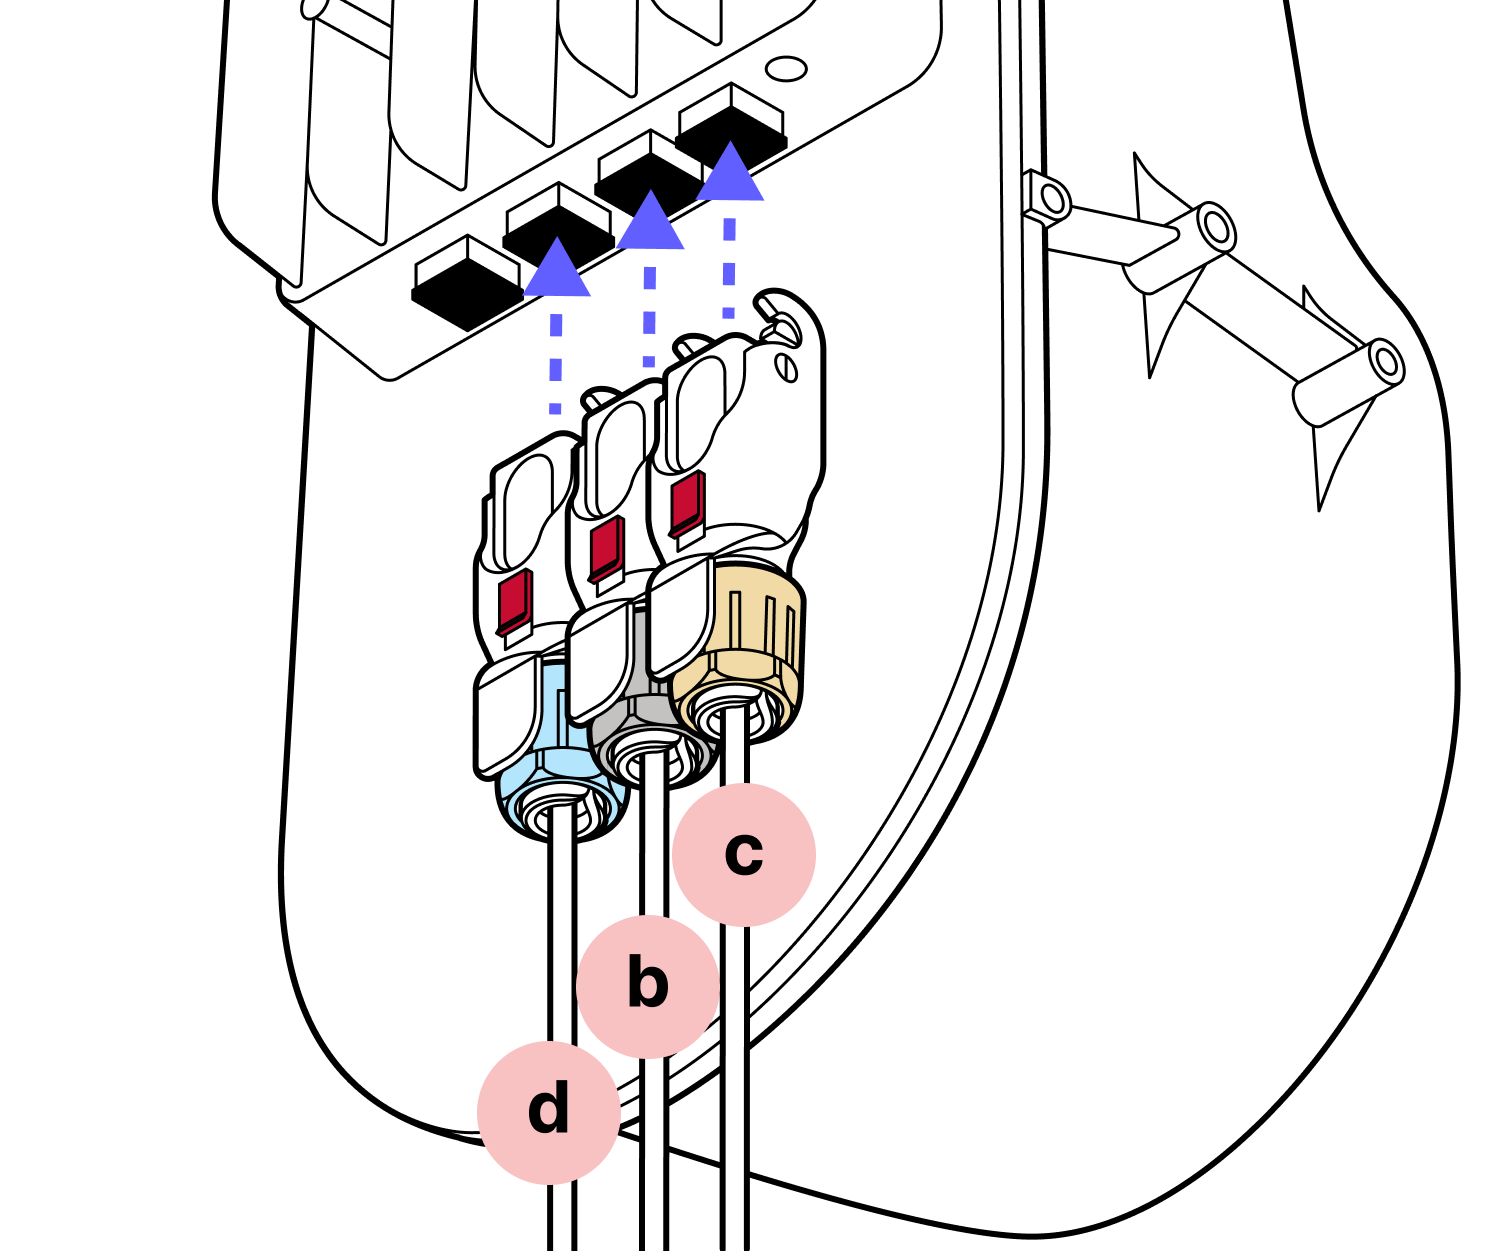
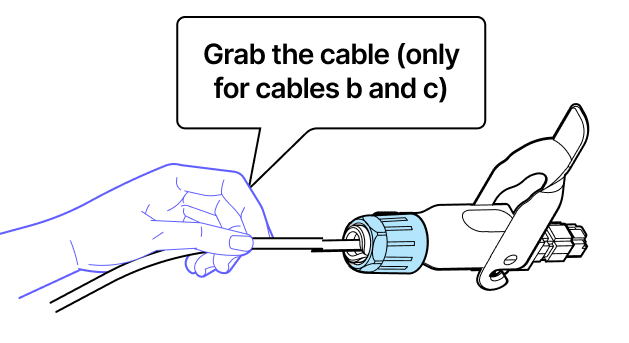
Start with one of the fiber connector(s) (blue cap). For the DC (yellow) and RJ45 (black) connectors it is important to push from the cable, NOT the plastic housing.
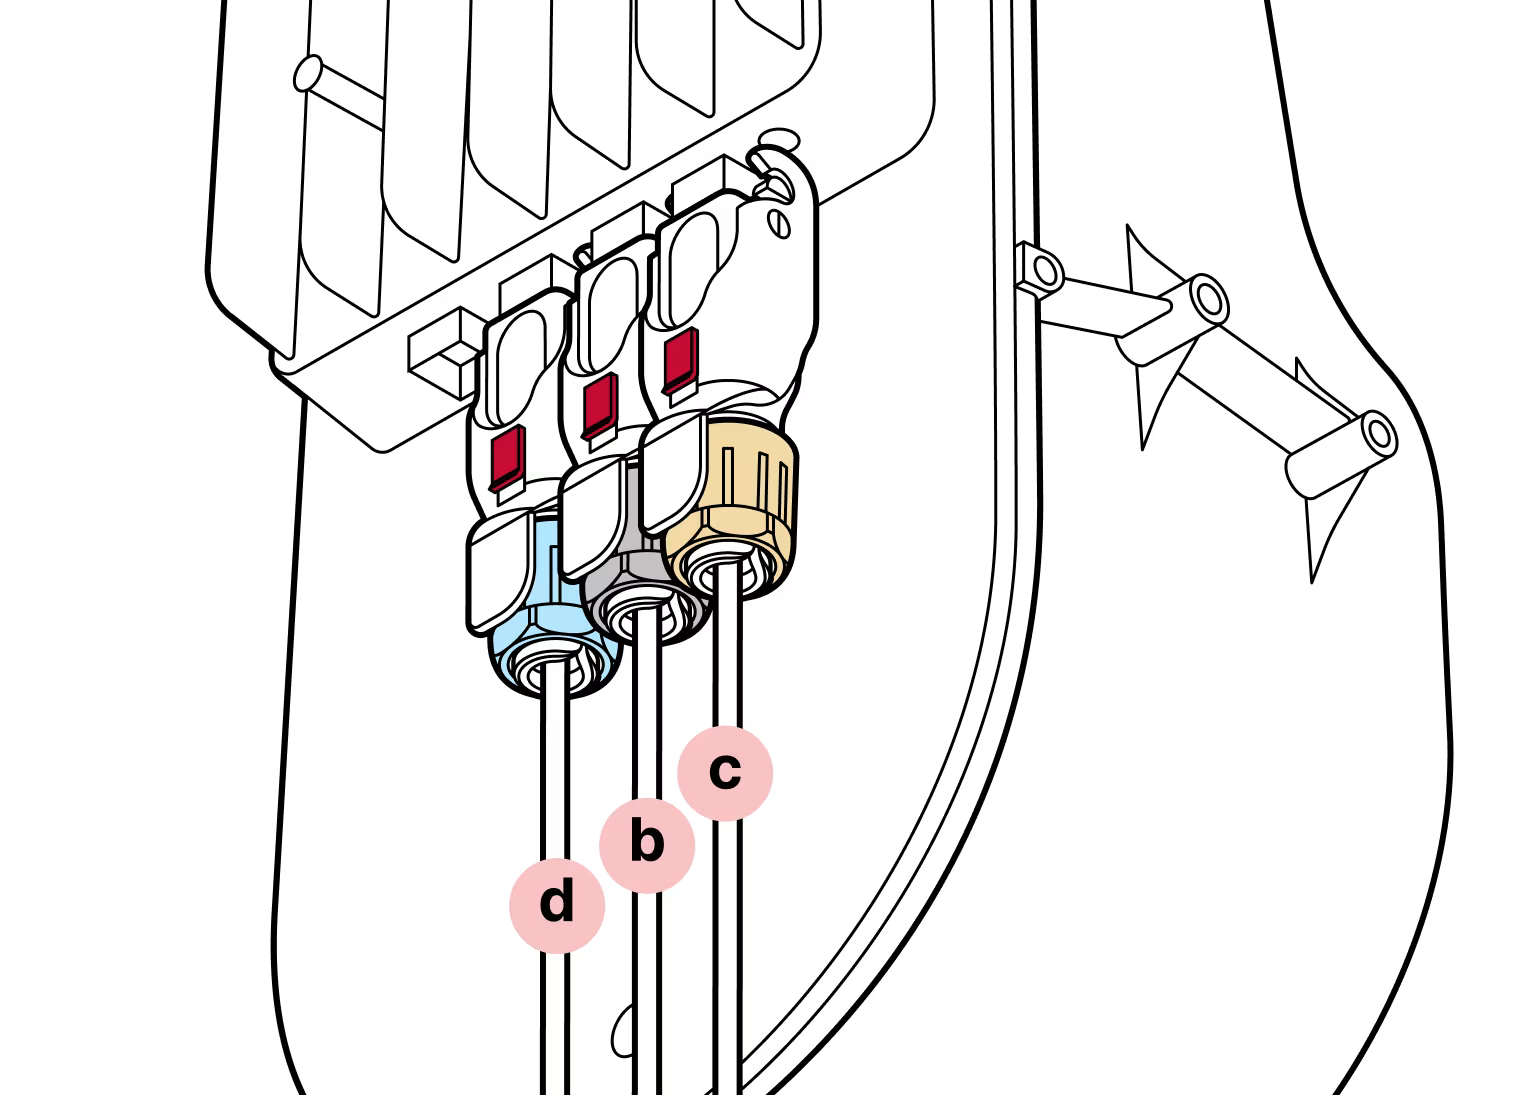
Step 12
The proper order of connectors is
- The SFP connector (blue) (both if using 2 SFP connectors)
- The RJ45 connector (black)
- The DC connector (yellow)
The DC connector should be UNPOWERED.
Step 13
Use the black hinge lock to lock the connectors into place and slide the red lock into the locked position.
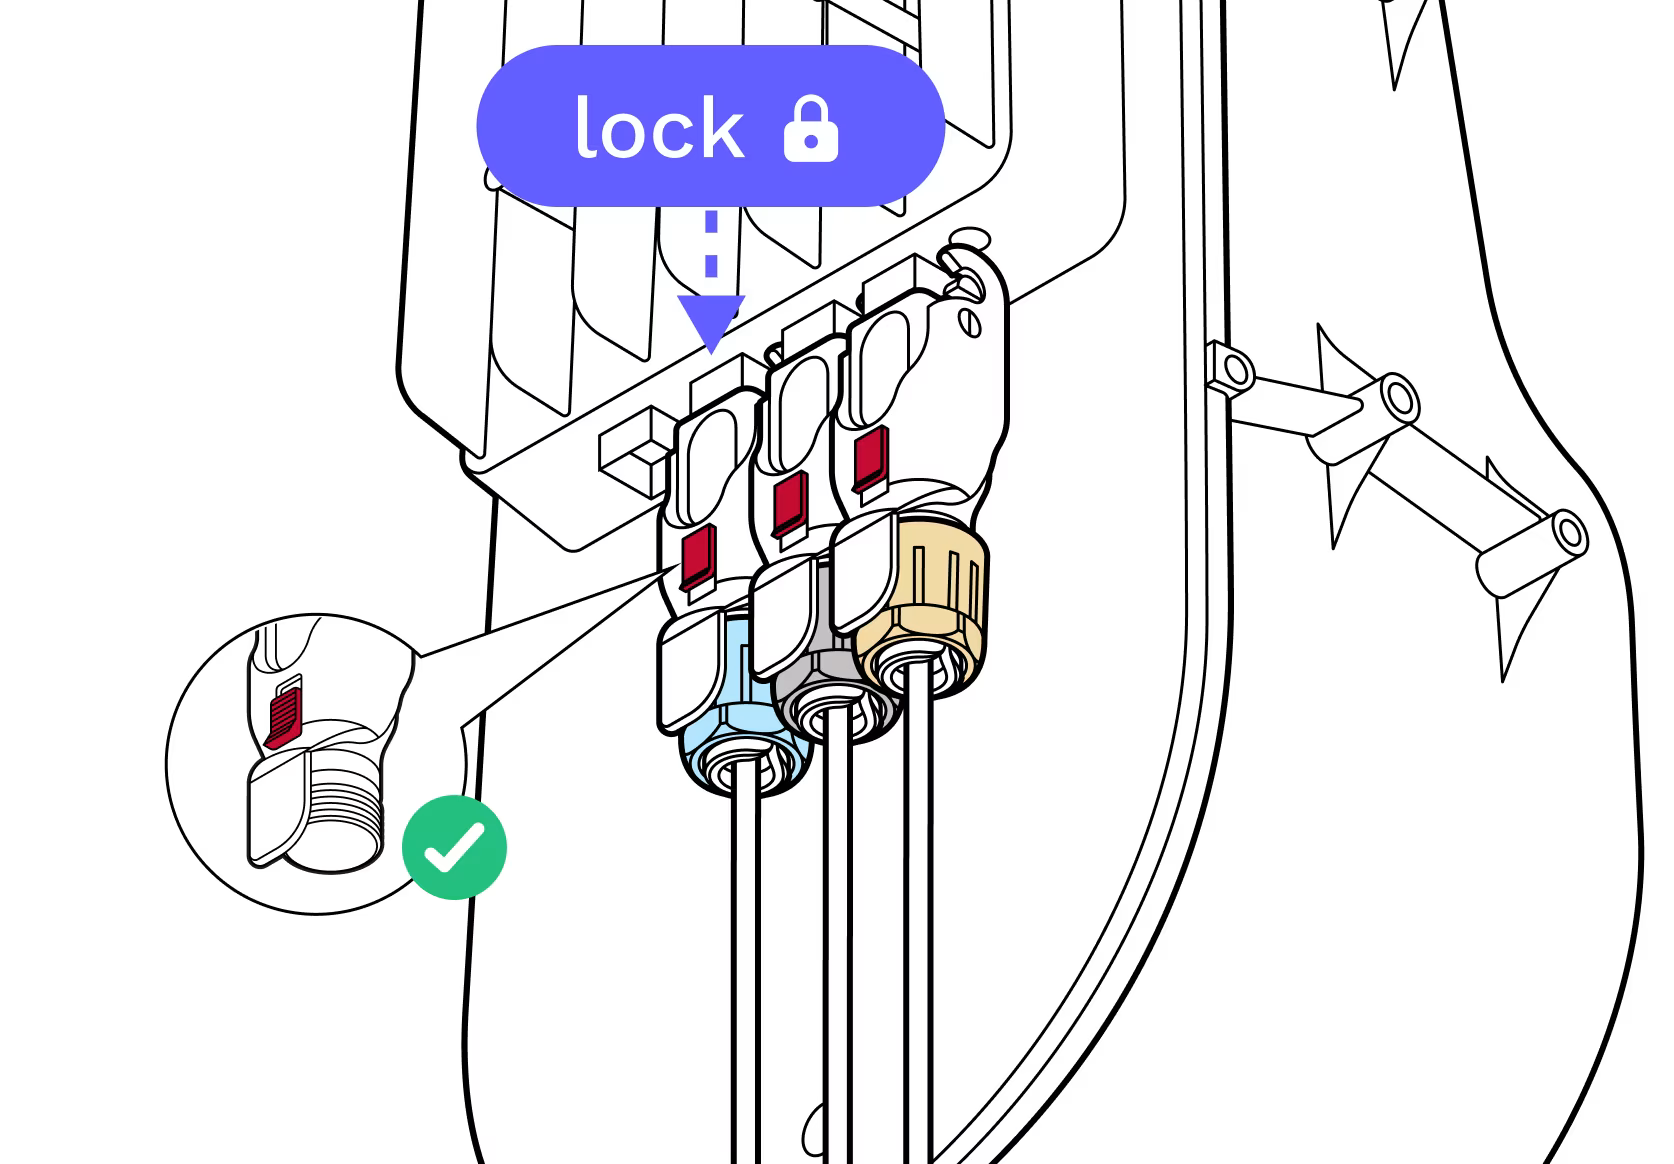
Step 14
Recheck to make sure all the cables are properly seated and locked via both the hinge lock and the red slide lock.
Step 15
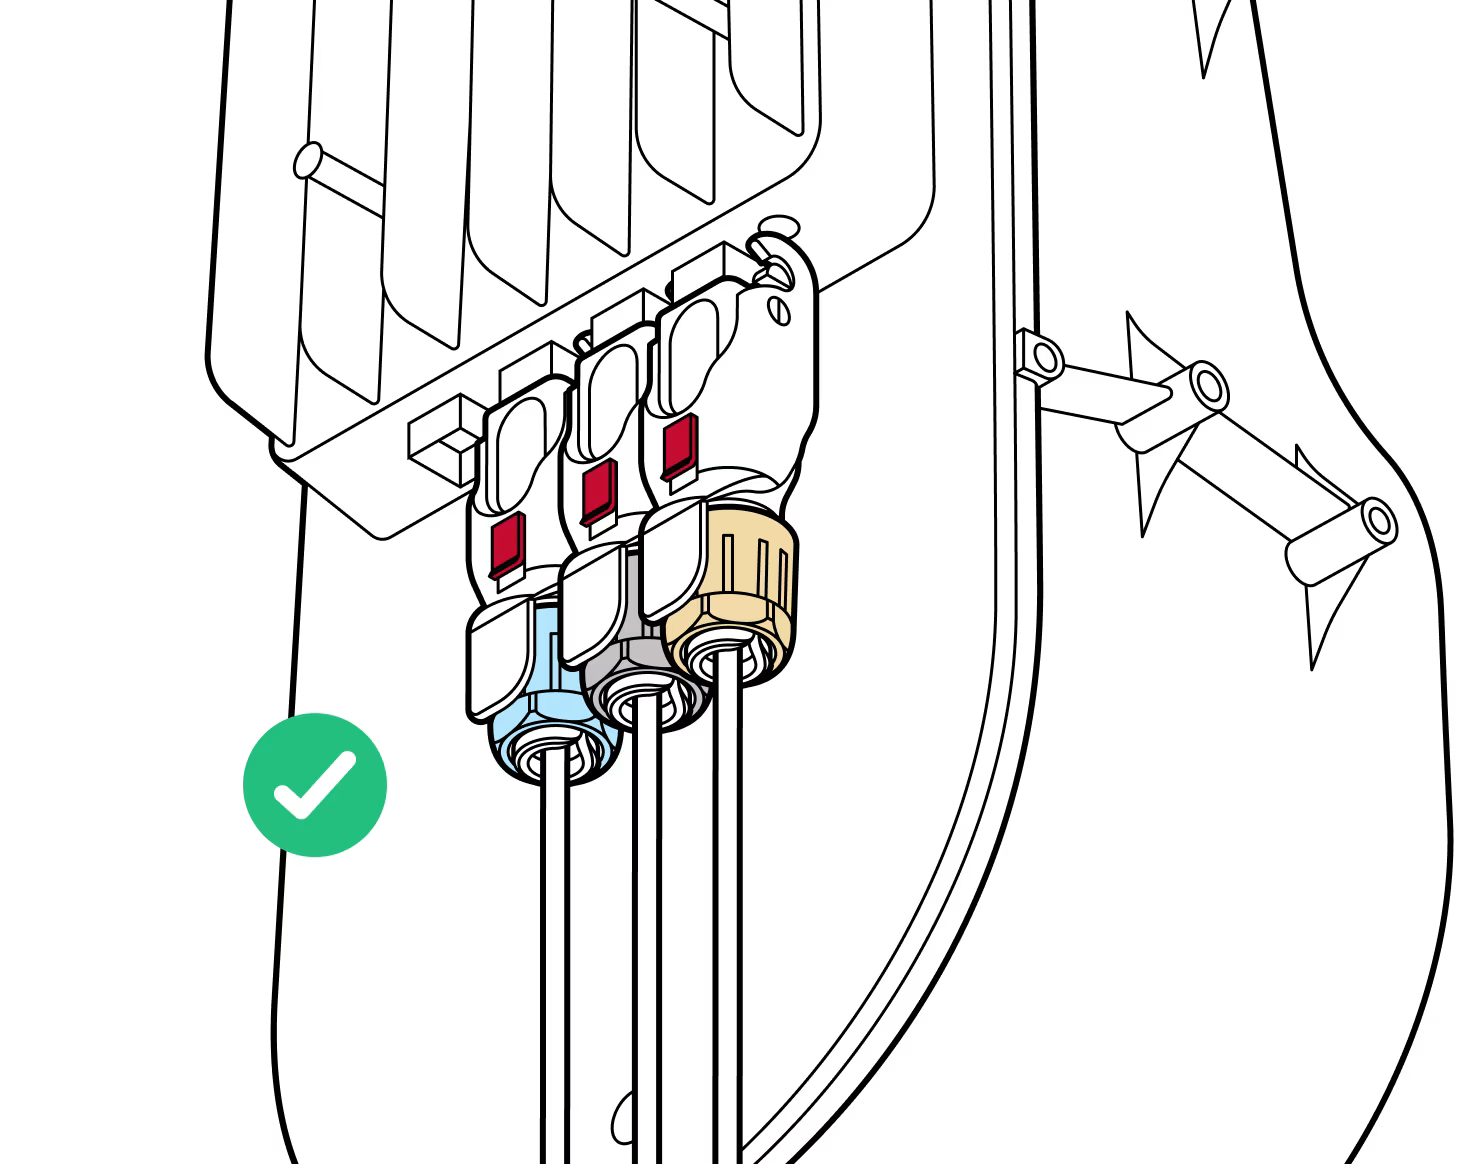
Check all connectors once installed
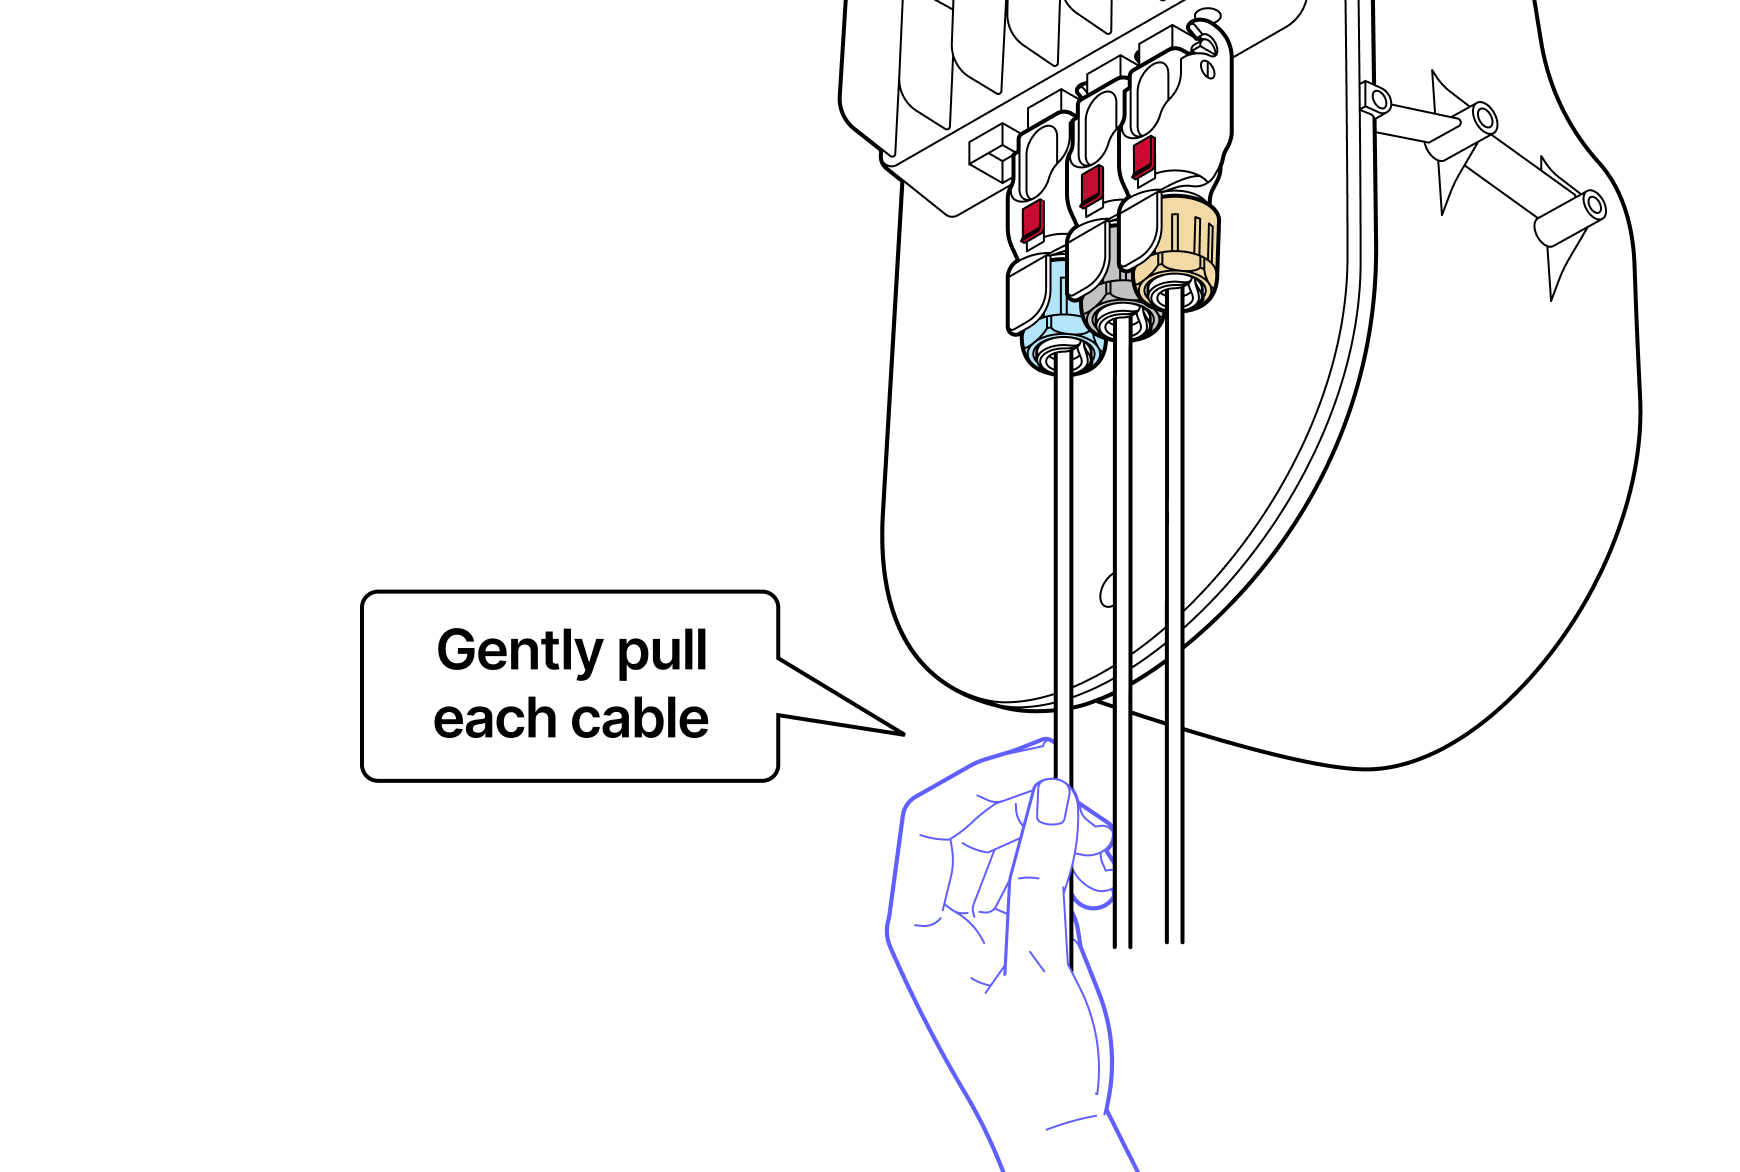
Gently pull each cable to make sure the cable is secured and does not back out of the connector. Once the terminal is fully mounted and the cables have been connected and checked, power on the terminal and remove the red lens cover.
Tips:
Keep the dust caps in place
Keep all dust and lens covers in place until installation is completed. Install the Octis connectors carefully - protect against moisture and insects!
Red lens cover
Don't forget to remove the red lens cover after physical installation and all connections are verified.
Mounting fasteners
When tightening the WOC terminal bolts, start with the top two. Tighten the four mounting fasteners to attach the WOC to the pole bracket (8.7 N-m max).
Do not remove the dust caps from the WOC terminal until you are ready to plug in the Octis connectors.
Last updated: April 2026